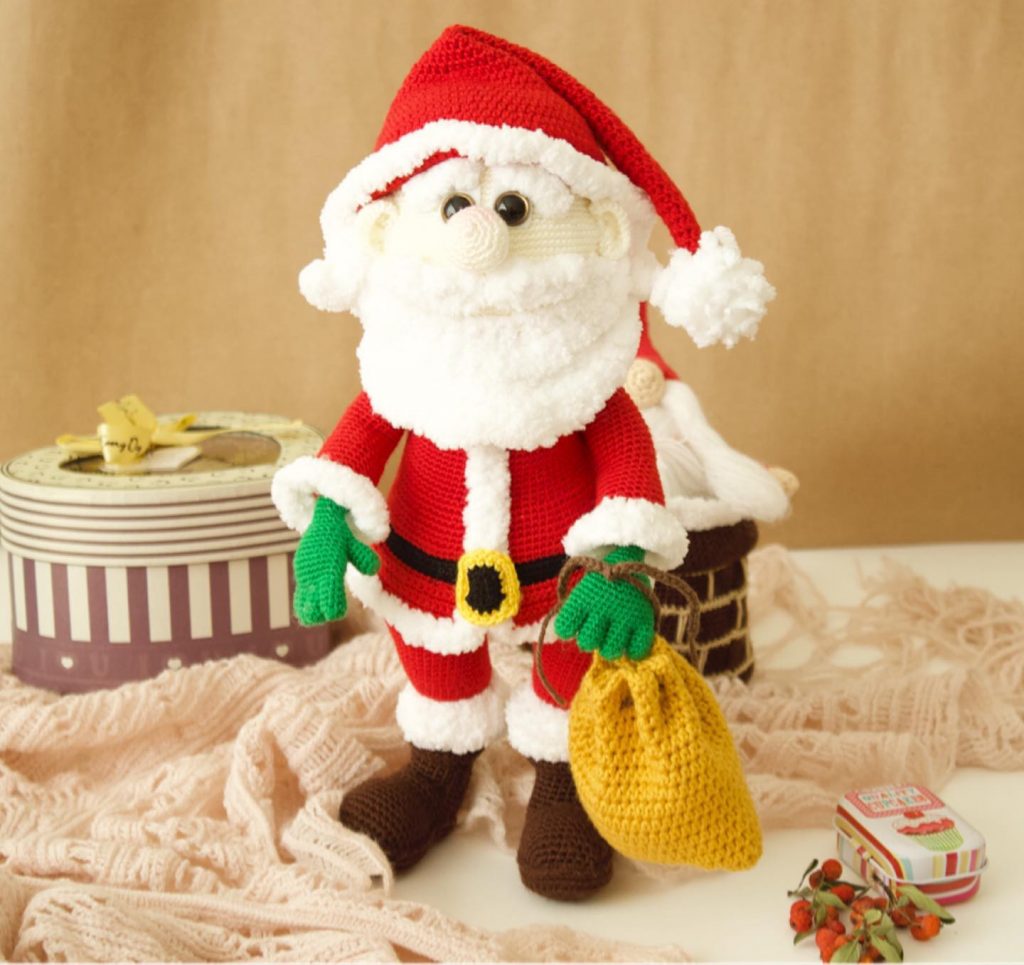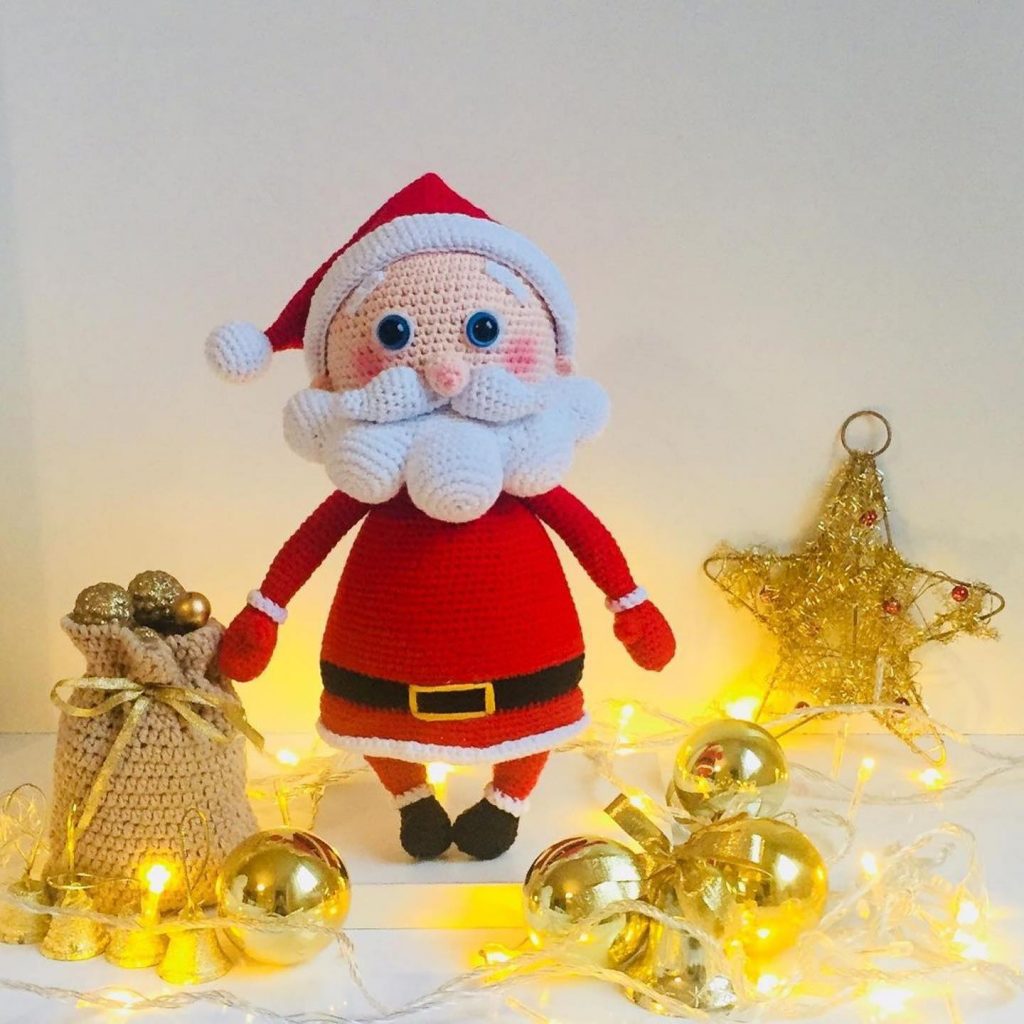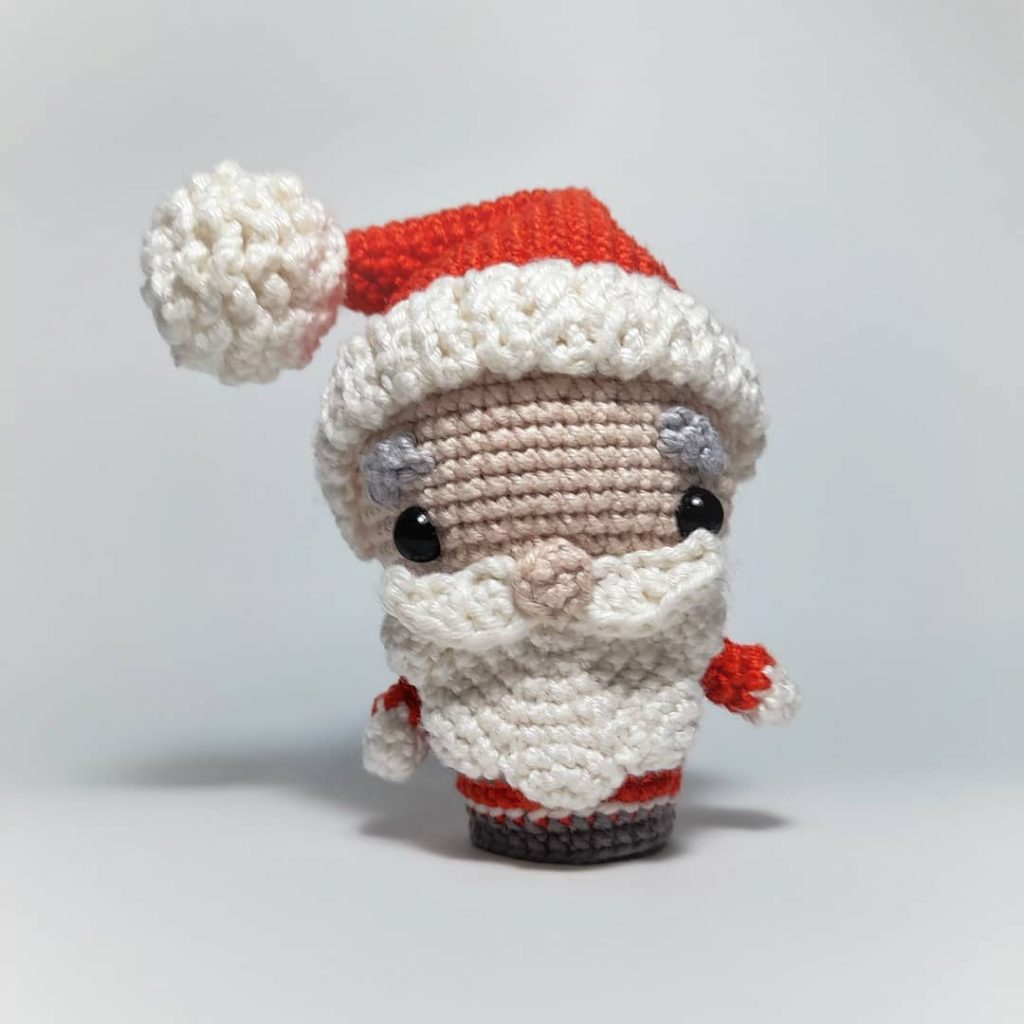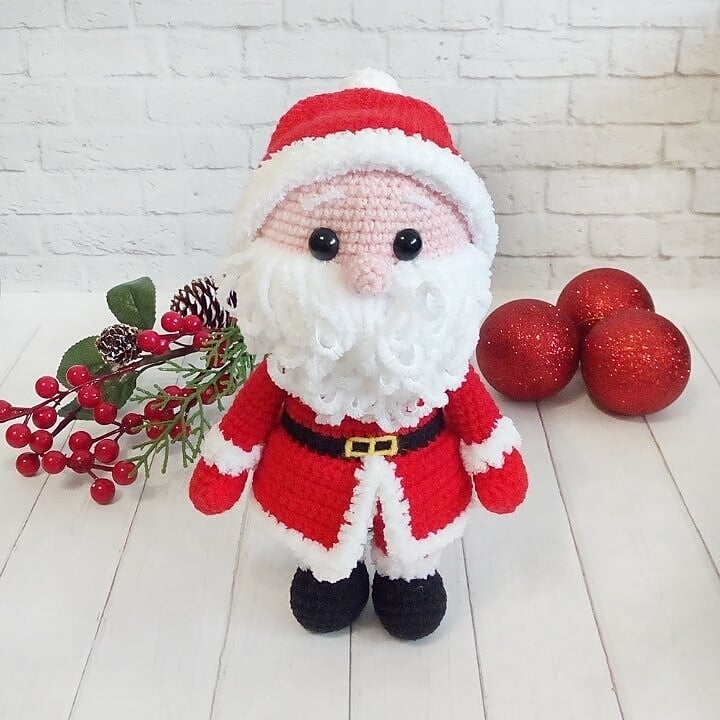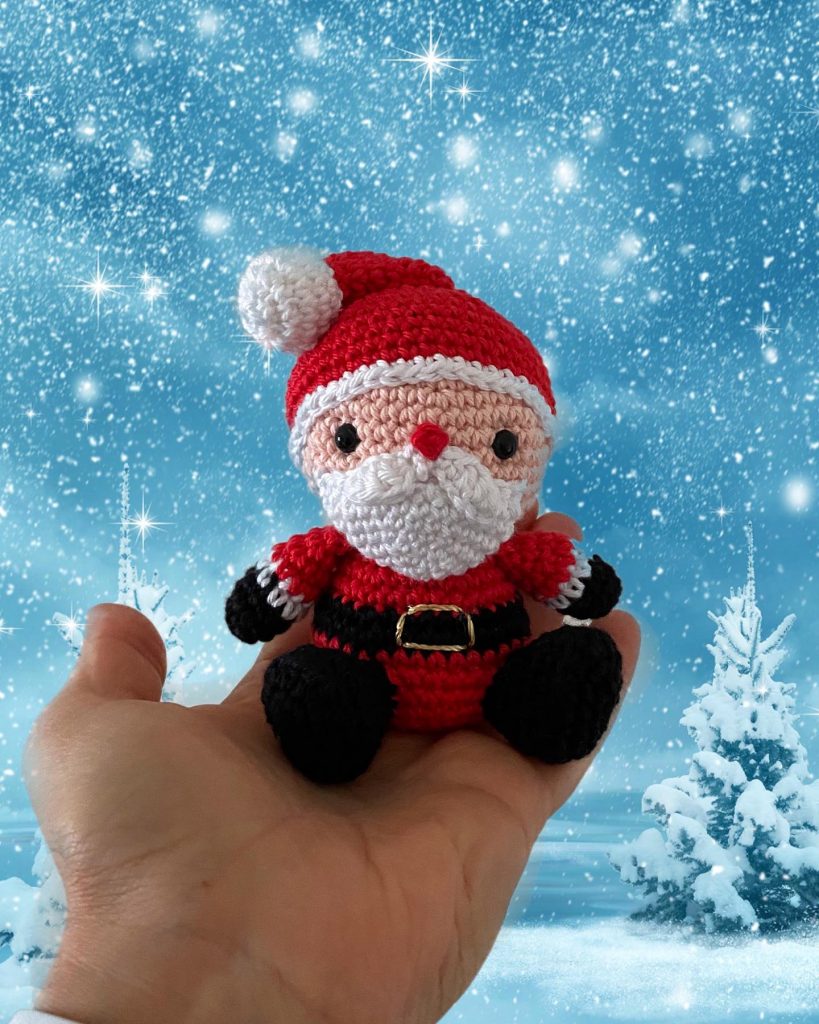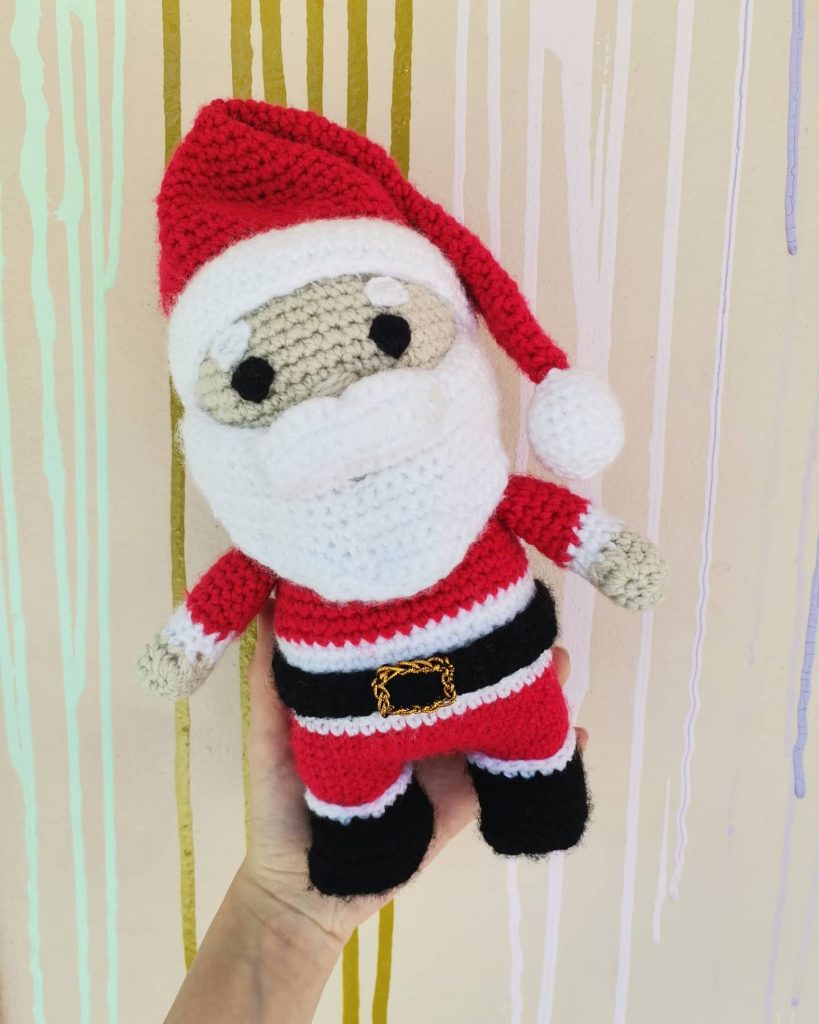
Amigurumi Santa Claus Free Pattern
Hello dear Amigurumi Followers
Today we share one free amigurumi crochet pattern again for you. As you know we share new amigurumi free patterns every day. The main crochets are amigurumi gazelles, amigurumi bears, amigurumi pola, amigurumi pandas, amigurumi penguins, amigurumi giraffes, amigurumi llama, amigurumi pigs, amigurumi bunny, amigurumi clowns, amigurumi lambs, amigurumi bees, amigurumi unicorns, amigurumi dolls, amigurumi foxes, amigurumi penguins, amigurumi dinosaurs, amigurumi elephants, amigurumi hippos, amigurumi monkeys, amigurumi cats, amigurumi dogs and more …
Todays daily new amigurumi free crochet pattern is amigurumi santa claus
I want to give you some informations about this pattern ;
If you enjoy making amigurumi, here I share this easy and free amigurumi pattern for you for free. Your kids will love these toys.
Materials
Yarn Alize Cotton Gold, cotton (55%), acrylic (45%), 330 m – 100 g. Weight: Sport (5 ply)
• Color skin (458);
• Color red (56);
• Color brown (493);
• Color dark green (35);
• Color off white (62).
Santa’s helper
Yarn Alize Cotton Gold
• Color skin (458);
• Color red (56);
• Color terracotta (36);
• Color dark green (35);
• Color yellow (83)
YarnArt Jeans Weight: Sport (5 ply)
• Color green (69).
Two black buttons Ø 6 mm (0,24 inch)
Abbreviations
R- row
MR – Magic ring;
St/Sts – stitch/stitches;
ch – chain stitch;
sl st – slip stitch;
sc – single crochet;
hdc – half double crochet;
dc – double crochet;
dec- decreasing (2 sc/dc together);
inc – increasing (2 sc/dc in 1 st);
bpsc- the back post single crochet;
fpsc- the front post single crochet.
Body and head (1piece)
Use a 2 mm crochet hook and brown colored yarn.
You are to add the filling as you go crocheting.
R 1: 6 sc in MR (6)
R 2: 6 inc (12)
R 3: (1 sc, 1 inc) 6 times (18)
R 4: 1 sc, 1 inc, (2 sc, 1 inc) 5 times, 1 sc (24)
R 5: (3 sc, 1 inc) 6 times (30)
R 6: 2 sc, 1 inc, (4 sc, 1 inc) 5 times, 2 sc (36)
R 7: (5 sc, 1 inc) 6 times (42)
R 8: 3 sc, 1 inc, (6 sc, 1 inc) 5 times, 3 sc (48)
R 9: 48 bpsc (48)
Take a piece of thick carton or a dense plastic and draw the bottom of the detail. The crocheted bottom should be well stretched on the round carton piece.
Set the round carton piece aside and continue crocheting.
R 10-12: 48 sc (48)
Cut off the brown colored yarn. Attach the off-white
colored yarn.
13th row is crocheted into the front loop of the stitch
R 13: 48 inc (96)
R 14-16: 1 sc in each stitch around (96)
R 17: 48 dec (48)
In the 18th row we join the back loops of the 12th and 17th rows with the help of the chains. You
are to make your chains very tight. Pay attention not to miss a stich.
R 18: (1 sc into the back loop of the 17th row, 1 ch, 1 sc into the back loop of the 12th row, 2 ch, 1 sc
into the back loop in next sc of the 17th row) repeat to end (48)
Cut off the off-white colored yarn. Attach the red colored one to the front loops of the previous row.
19th row is crocheted into the front loop of the stitch
R 19-25: 1 sc in each stitch around (48)
R 26: 7 sc, 1 dec, (14 sc, 1 dec) 2 times, 7 sc (45)
R 27: (13 sc, 1 dec) 3 times (42)
R 28: 6 sc, 1 dec, (12 sc, 1 dec) 2 times, 6 sc (39)
R 29: (11 sc, 1 dec) 3 times (36)
R 30: 5 sc, 1 dec, (10 sc, 1 dec) 2 times, 5 sc (33)
Place the round carton piece onto the bottom of the detail.
Start putting the filling inside watching out that the carton stays in place pressed tightly to the bottom
so that the detail remains stable.
R 31: (9 sc, 1 dec) 3 times (30)
R 32: 30 sc (30)
R 33: (3 sc, 1 dec) 6 times (24)
Cut off the red yarn. Attach the skin yarn and continue crocheting.
34th row is crocheted into the back loop of the stitch
R 34: 1 sc in each stitch around (24)
R 35: (1 sc, 1 inc) 12 times (36)
R 36: (5 sc, 1 inc) 6 times (42)
Put aside the main detail. Let’s crochet the collar of the coat.
Use 2 mm hook.
Turn the detail so that its back is facing you and turn it
bottom up. Attach the off-white yarn to the front loops
of the 33rd row in the center of the front of the detail (so
that the seam of the collar would remain under the
beard. Insert the hook into the loop in the direction of
the bottom of the detail. We are going to crochet the
collar in attached rows.
To make an even seam ch 1 (at the beginning of the row), sl
st to join does not count as a stitch now and throughout.
Crochet the first sc of each round into the base of the chain.
Crochet three rows of the collar:
R1: 1 ch, 2 sc in each stitch around, sl st to the 1st sc of the
round to join (42)
R 2: 1 ch, 1 sc in each stitch around, sl st to the 1st sc of the
round to join (42)
R 3: (1 ch, 1sl st) in each stitch around, last sl st into the
base of the 1 ch to join.
Cut and fix the yarn.
Continue crocheting the main detail.
R 37-43: 1 sc in each stitch around (42)
R 44: (5 sc, 1 dec) 6 times (36)
R 45: 2 sc, 1 dec, (4 sc, 1 dec) 5 times, 2 sc (30)
R 46: (3 sc, 1 dec) 6 times (24)
R 47: 1 sc, 1 dec, (2 sc, 1 dec) 5 times, 1 sc (18)
R 48: (1 sc, 1 dec) 6 times (12)
R 49: 6 dec (6)
Stuff the head tightly. Close the opening, fix the yarn and
hide its tails inside the detail.
Arms (2 pieces)
Use a 2 mm crochet hook and skin colored yarn.
Start at the underside of the arm.
R 1: 6 sc in MR (6)
R 2: (2 sc, 1 inc) 2 times (8)
R 3-6: 1 sc in each stitch around (8)
Cut off the skin colored yarn. Attach off white colored yarn.
R 7: (1 sc, 1 inc) 4 times (12)
Cut off the off white colored yarn. Attach red colored yarn.
R 8-12: 1 sc in each stitch around (12)
Insert some filling into the skin colored part of the arm. The upper part of the arm could be left without
the filling or you could just put some very little amount into it.
Fold the top of the arm and do six single crochets going through both sides of the arm to make it flat.
Cut off the yarn leaving a long tail for sewing.
Nose
Use a 2 mm crochet hook and skin colored yarn.
R 1: 6 sc in MR (6)
R 2: (1 sc, 1 inc) 3 times (9)
R 3: 1 sc in each stitch around, sl st to the 1st sc of the
round to join (9)
Fix and cut off the yarn.
The Beard
Use a 2 mm crochet hook and off white colored yarn.
R 1: 6 sc in MR (6)
R 2: (2 sc, 3 sc in one st) 2 times (10)
R 3: 3 sc, 3 sc in one st, 4 sc, 3 sc in one st, 1 sc (14)
R 4: 14 sc (14)
R 5: 4 sc, 3 sc in one st, 6 sc, 3 sc in one st, 2 sc (18)
R 6: 18 sc (18)
R 7: 5 sc, 3 sc in one st, 8 sc, 3 sc in one st, 3 sc (22)
R 8: 6 sc, 3 sc in one st, 10 sc, 3 sc in one st, 4 sc (26)
R 9: 7 sc, 3 sc in one st, 12 sc, 3 sc in one st, 5 sc (30)
R 10: 8 sc, 3 sc in one st, 14 sc, 3 sc in one st, 6 sc (34)
Then we crochet an incomplete row.
R 11: 9 sc
Fold the detail so that the lines of the increases are at the sides. Insert some small amount of filling into
the beard and do 17 single crochets going through both sides of the beard to make it flat. Fix and cut
off the yarn.
Moustache
Use a 2 mm crochet hook and off white colored yarn.
Ch 12 and work starting from the 2 nd st from the hook: 1 sl st, 1 hdc, 2 dc, 1 hdc, 1 sl st, 1 hdc, 2 dc,
1 hdc, 1 sl st.
Cut off the yarn. Tie the tails of the yarn of the beginning and of the end of the detail and fix them
at the wrong side of the detail.
The Plank for the Fur Coat
Use a 2 mm crochet hook and off white colored yarn.
Ch 13 and work starting from the 2 nd st from the hook around the foundation chain:
R 1: 11 sc, 4 sc in one st, 11sc, turn the work (26)
R 2: 1 ch, 11 sc, 4 inc, 11 sc (30)
Fix and cut off the yarn.
Hair
Use a 2 mm crochet hook and off white colored yarn.
Ch 6 and work starting from the 2 nd st from the hook:
R 1: 5 sc, turn the work
R 2-23: 1ch, 5 sc into the back loop of the stitch, turn the work.
Cut off the yarn leaving a long tail for sewing.
Note: I crocheted a detail 23 rows long and depending on the thickness of your yarn and the tightness
of your crocheting, you might crochet more or less rows. Measure the detail against the head of the toy
while you are crocheting to make the size right.
Assembling of the toy
Fix the arms with sewing pins to the 33rd row (under the collar).
Attach the arms at the upper end taking in turns the stitches of the arms and of the body, then raise the arms and make several stitches to attach the inner side of the arms
Fix the plank to the coat in the center of the front with the help of the sewing pins and attach it with
small stitches around the contour of the plank.
Attach the beard to the 38th row (this is the 5th row of the head that is crocheted with the skin colored yarn). Sew the beard on taking in turns the stitches of the beard and those of the head. Use thin sewing thread so that the
seams do not show.
Fix the moustache so that the upper part of it is one row above the beard. Use thin sewing thread so that the seams do not show. Sew the moustache on in the center and then attach it following the upper line leaving one stitch at each end unattached. Sew the moustache on with the help of the backstitch taking one single crochet at a time. You can leave the bottom line of the moustache unattached.
Add some filling to the nose detail. Attach the nose on top of the moustache. The upper line of the nose should be one row above the mustache. Use thin sewing thread so that the seams do not show.
Sew or glue the eyes on one row above the nose at a three single crochet distance from one another.
Use the off-white colored yarn for the eyebrows. Make two stitches for each eyebrow taking two single crochets at a time.
Attach the hair to the head using sewing pins and then sew it on with the help of the backstitch taking
two single crochets at a time.
Sew two small black buttons onto the plank or make two French stitches with some black yarn.
Put some blush onto Santa’s cheeks and nose
Hat
Begin with the red colored yarn. Use 2,5 mm hook.
Work in joined rounds.
To make an even seam ch 1 (at the beginning of the row), sl st to join does not count as a stitch now
and throughout. Crochet the first sc of each round into the base of the ch.
R 1: 1 ch, 6 sc in MR, sl st to the 1st sc of the round to join (6)
R 2: 1 ch, (2 sc, 1 inc) 2 times, sl st to the 1st sc of the round to join (8)
Do not cut off the red yarn. Add the off white thread and continue crocheting
R 3: 1 ch, 1 sc in each stitch around, sl st to the 1st sc of the round to join (8)
Change to red colored yarn
R 4: 1 ch, (3 sc, 1 inc) 2 times, sl st to the 1st sc of the round to join (10)
R 5: 1 ch, 1 sc in each stitch around, sl st to the 1st sc of the round to join (10)
Change to off white colored yarn
R 6: 1 ch, 2 sc, 1 inc, 4 sc, 1 inc, 2 sc, sl st to the 1st sc of the round to join (12)
Change to red colored yarn
R 7: 1 ch, 1 sc in each stitch around, sl st to the 1st sc of the round to join (12)
R 8: 1 ch, (5 sc, 1 inc) 2 times, sl st to the 1st sc of the round to join (14)
Change to off white colored yarn
R 9: 1 ch, 1 sc in each stitch around, sl st to the 1st sc of the round to join (14)
Change to red colored yarn
R 10: 1 ch, 3 sc, 1 inc, 6 sc, 1 inc, 3 sc, sl st to the 1st sc of the round to join (16)
R 11: 1 ch, 1 sc in each stitch around, sl st to the 1st sc of the round to join (16)
Change to off white colored yarn
R 12: 1 ch, (7 sc, 1 inc) 2 times, sl st to the 1st sc of the round to join (18)
Change to red colored yarn
R 13: 1 ch, 1 sc in each stitch around, sl st to the 1st sc of the round to join (18)
R 14: 1 ch, (5 sc, 1 inc) 3 times, sl st to the 1st sc of the round to join (21)
Change to off white colored yarn
R 15: 1 ch, 1 sc in each stitch around, sl st to the 1st sc of the round to join (21)
Change to red colored yarn
R 16: 1 ch, 3 sc, 1 inc, (6 sc, 1 inc) 2 times, 3 sc, sl st to the 1st sc of the round to join (24)
R 17: 1 ch, 1 sc in each stitch around, sl st to the 1st sc of the round to join (24)
Change to off white colored yarn
R 18: 1 ch, (7 sc, 1 inc) 3 times, sl st to the 1st sc of the round to join (27)
Change to red colored yarn
R 19: 1 ch, 1 sc in each stitch around, sl st to the 1st sc of the round to join (27)
R 20: 1 ch, 4 sc, 1 inc, (8 sc, 1 inc) 2 times, 4 sc, sl st to the 1st sc of the round to join (30)
Change to off white colored yarn
R 21: 1 ch, 2 sc, 1 inc, (4 sc, 1 inc) 5 times, 2 sc, sl st to the 1st sc of the round to join (36)
Change to red colored yarn
R 22: 1 ch, (5 sc, 1 inc) 6 times, sl st to the 1st sc of the round to join (42)
R 23: 1 ch, (20 sc, 1 inc) 2 times, sl st to the 1st sc of the round to join (44)
Cut off the red colored yarn. Continue crocheting only with the off white yarn. R 24: 1 ch, 1 sc in
each stitch around, sl st to the 1st sc of the round to join (44)
Note: Crochet the first fpsc of 25 st round into the base of the 1 ch.
R 25: 1 ch, (1 fpsc, 1 bpsc) and repeat until the end of the row, sl st to the 1st fpsc of the round to
join (44)
R 26: 1 ch, 1 sc in each stitch around, sl st to the 1st sc of the round to join (44)
Cut and fasten off.
Hat Pompom
Use the 2 mm crochet hook and off white colored yarn.
Stuff the detail in the process but not too tightly – it should be soft.
R 1: 6 sc in MR (6)
R 2: 6 inc (12)
R 3-5: 1 sc in each st (12)
R 6: 6 dec (6)
Close the opening, fix the yarn leaving a long tail for sewing. Attach the pompom to the end of the hat.
Fix the hat on Santa’s head and sew it on with several stitches. Bend the hat to the side and fix it with
some stitches or just press it with the steam iron through a damp cloth.
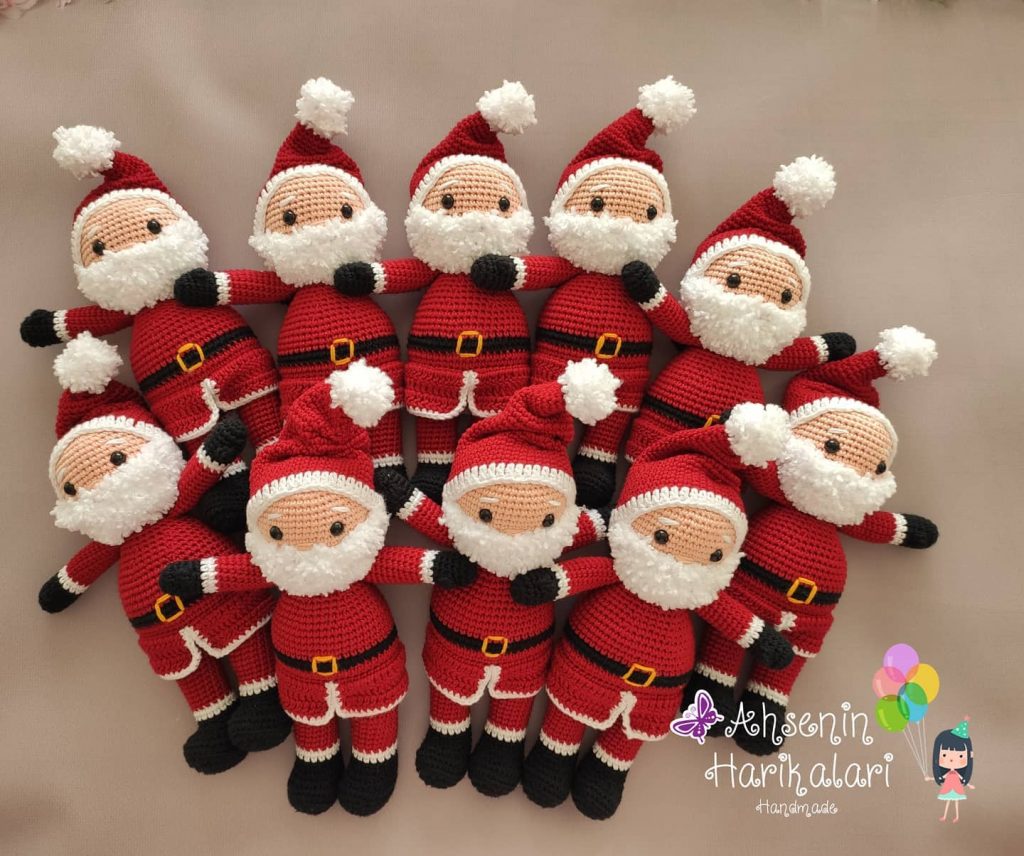
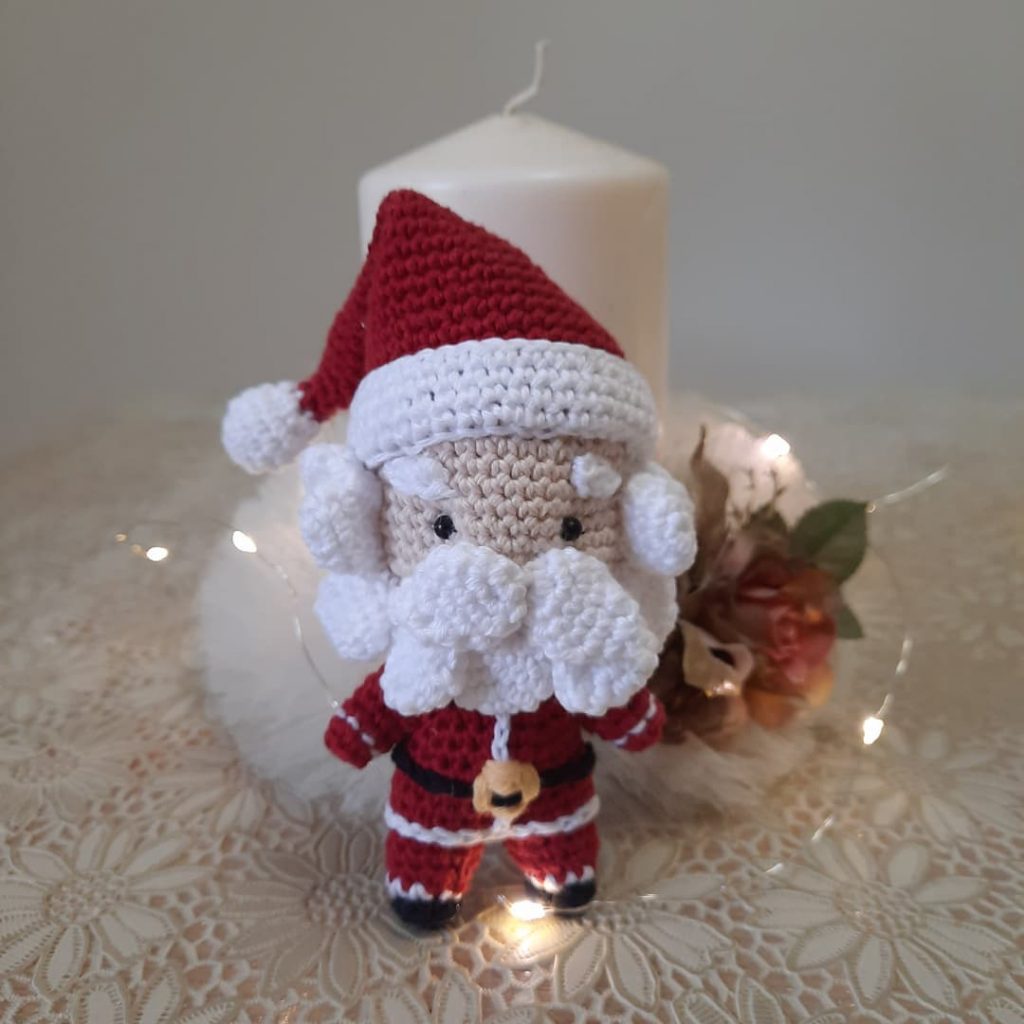
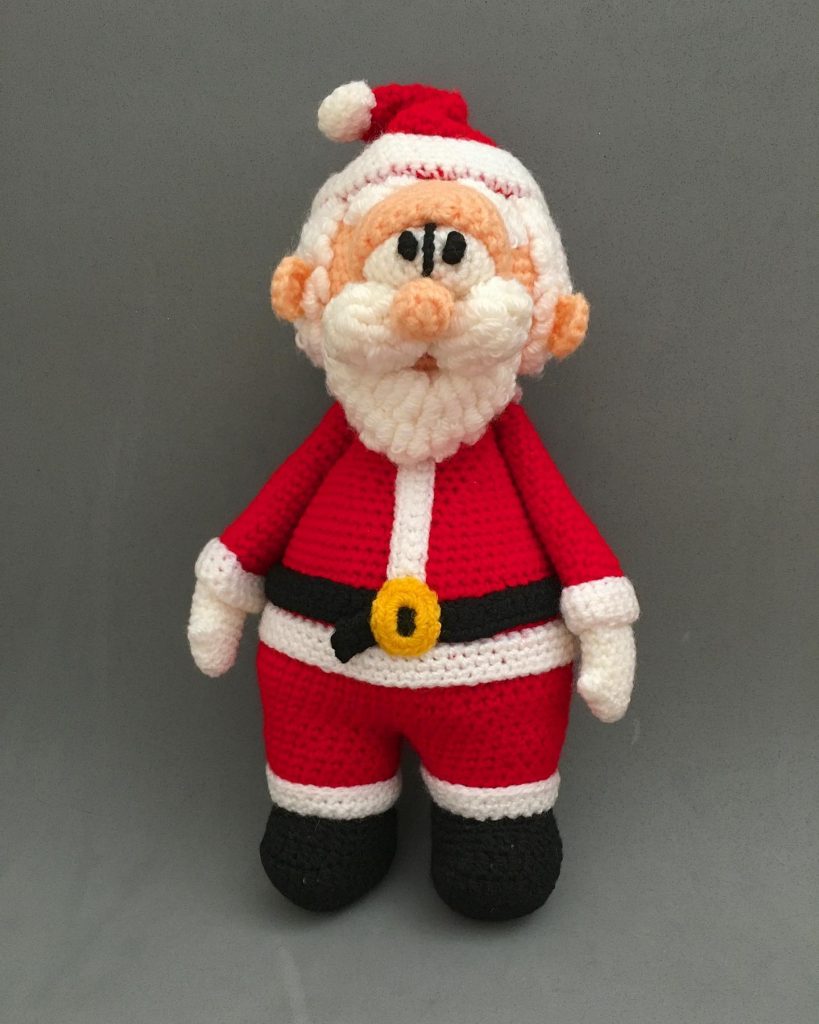
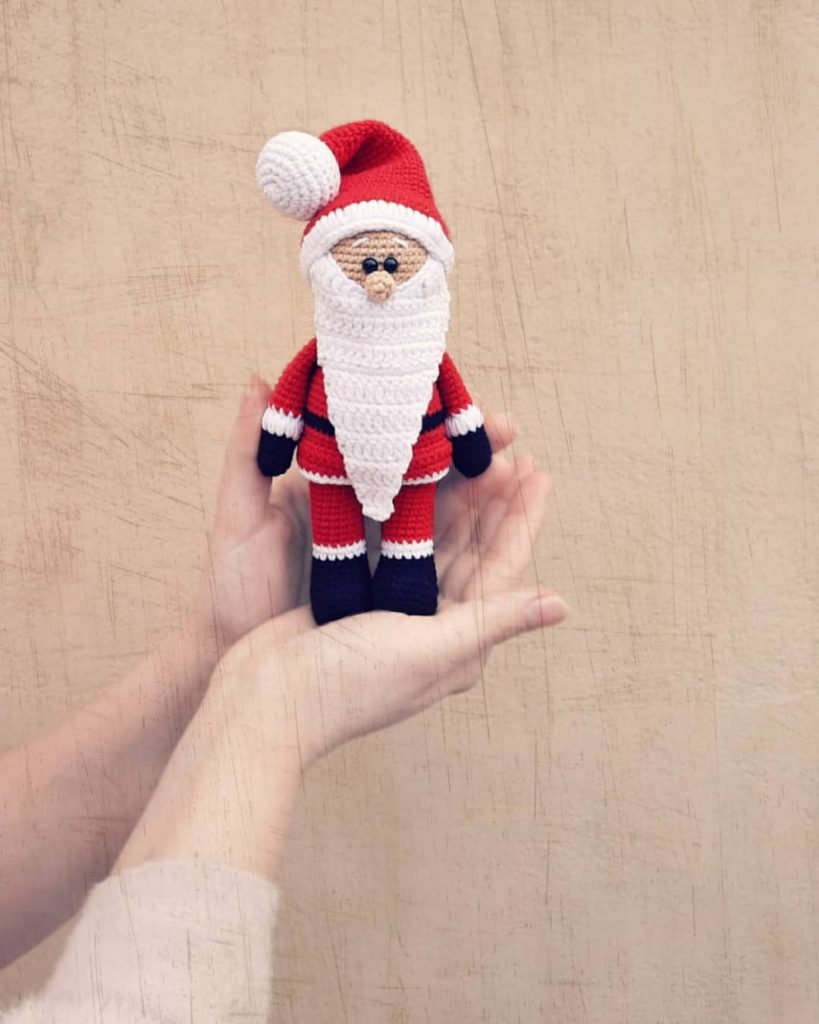
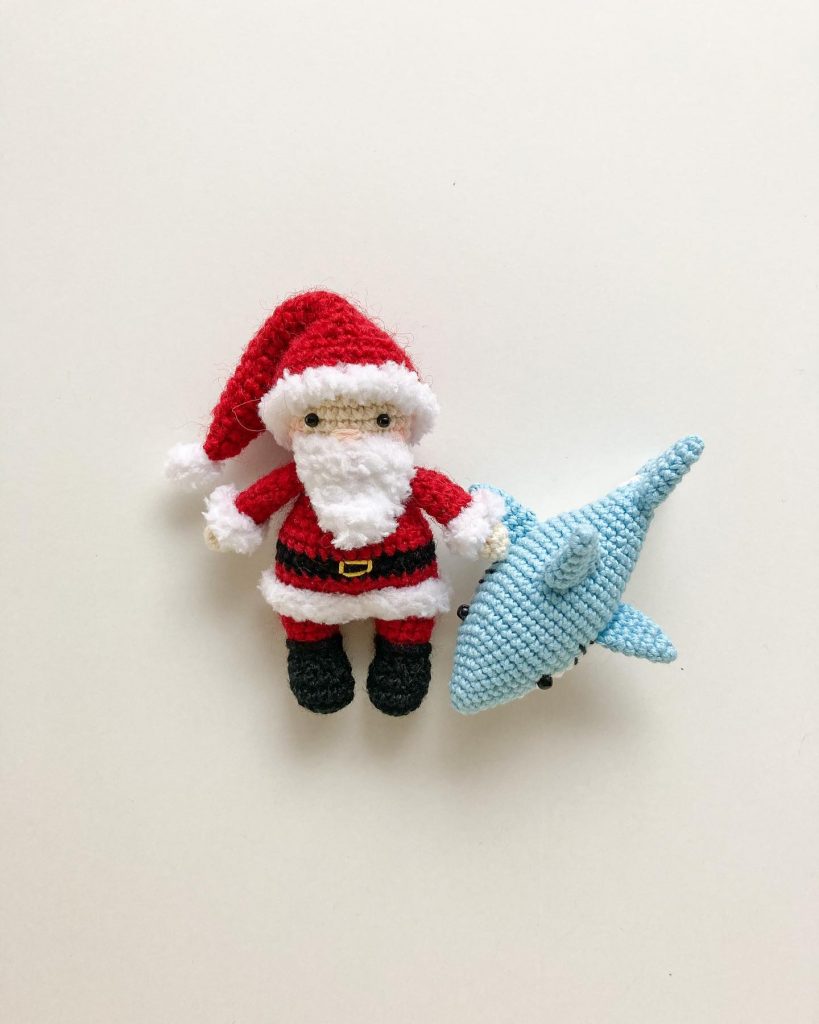
More Amigurumi Santa Claus İdeas