Cute Crochet Amigurumi Cat Free Pattern
Hello dear Amigurumi Followers
Today we share one free amigurumi crochet pattern again for you. As you know we share new amigurumi free patterns every day. The main crochets are amigurumi gazelles, amigurumi bears, amigurumi pola, amigurumi pandas, amigurumi penguins, amigurumi giraffes, amigurumi llama, amigurumi pigs, amigurumi bunny, amigurumi clowns, amigurumi lambs, amigurumi bees, amigurumi unicorns, amigurumi dolls, amigurumi foxes, amigurumi penguins, amigurumi dinosaurs, amigurumi elephants, amigurumi hippos, amigurumi monkeys, amigurumi cats, amigurumi dogs and more …
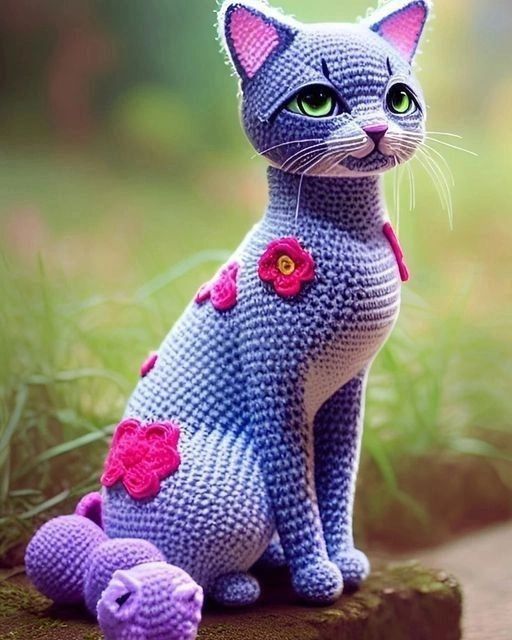
Todays daily new amigurumi free crochet pattern is amigurumi cat
I want to give you some informations about this pattern ;
If you enjoy making amigurumi, here I share this easy and free amigurumi pattern for you for free. Your kids will love these toys.
Materials:
Red Heart Comfort Yarn (silver) and small amount of black
safety eyes
3mm crochet hook
fiberfill
Abbreviations
MR: Magic ring
Sc: Single crochet
Ch: Chain
Inc: Increase
Dec: Decrease
Slst: Slip stitch
Cat – Head – starting at nose
Rnd 1. MC, sc x6 (6)
Rnd 2. Inc around (12)
Rnd 3. (Sc, inc) around (18)
Rnd 4. Sc, inc, (Sc x2, inc) x5, Sc (24)
Rnd 5. Sc around (24)x2 rows
Rnd 7. (Inc, sc x2) around (32)
Rnd 8. (Sc x3, inc) around (40)
Rnd 9. Sc x9, inc, sc x3, inc, sc x3,inc, sc, inc, sc, inc, scx3, inc, sc x3, inc, sc x9,
inc (48) eyes will go into row indent, right above middle stitch of each marked group
Rnd 10. Sc around (48) x2 rows
Rnd 12. Sc x8, dec, sc x4, dec, sc x16, dec, sc x4, dec, sc x8 (44)
Rnd 13. Sc around (44) x6 rows don’t forget to attach safety eyes on marked stitch as above
Rnd 19. (Sc x9, dec) around (40)
Rnd 20. (Sc x6, dec) around (35)
Rnd 21. (Sc x5, dec) around (30)
Rnd 22. Sc x2, dec, (sc x4, dec)x4, sc x2 (25)
Rnd 23. Dec, (sc x3, dec)x4, sc x3 (20) —> STUFF firmly and continue to do so until
closing.
Rnd 24. (Sc x2, dec) around (15)
Rnd 25. (Sc, dec) around (10) FInish off, leave tail long enough to weave through
remaining stitches and pull closed. Secure and weave in end.
Cat – Ears – (make 2)
Rnd 1. MC, sc x6
Rnd 2. Sc x6
Rnd 3. (Inc, sc x2)x2 (8)
Rnd 4. (Inc, sc x3)x2 (10)
Rnd 5. (Inc, sc x4)x2 (12)
Rnd 6. (Inc, sc x5)x2 (14)
Rnd 7. (Inc, sc x6)x2 (16)
Rnd 8. (Inc, sc x7) x2 (18)
Rnd 9. Inc x2, sc x6, inc x3, sc x6, inc (24)
Rnd 10. Sc x1, inc, sc x11, inc, sc x10 (26) FO. Leave tail for sewing.
After completing ears sew to head. I stitched around eyes to make them less ‘out
there’ and sewed a nose and mouth on with black yarn. To pull the eyes in stitch
from one to the other in body yarn and pull until desired look. Do the same with
the nose and mouth.
Cat – Front Foot/Leg – (LEFT and RIGHT)- Make BEFORE cat body, as they will be crocheted into the body as you go.
Note: When crocheting the toe or thumb stitch use only the 2 front loops of the
hdc from previous row.
Toe st – The toe stitch is just a puff stitch variant- (yo, insert hook, yo, pull through)continuing in same stitch, repeatx3 (9 loops on hook), yo, pull through
all 9 loops, ch 1
Thumb st – The thumb stitch is another variant of the puff- (yo, insert hook, yo,
pull through)x2, yo pull through all 7 loops, ch 1
Rnd 1. MC, sc x6 (6)
Rnd 2. Inc around (12)
Rnd 3. (Sc, inc) around (18)
Rnd 4. Hdc x4, sc x14 (18)
Rnd 5. LEFT foot – Toe st x4, sc x2, hdc, sc x11 (22) RIGHT foot – Toe st x4, sc
x11, hdc, sc x2 (22)
Rnd 6. LEFT foot – Dec x4, sc x2, thumb st, dec, sc x9 (18) RIGHT foot – Dec x4,
sc x9, dec, thumb st, sc x2 (18)
Rnd 7. LEFT foot – Sc x6, dec, sc x6, dec, sc x2 (16) RIGHT foot – Sc x2, dec, sc
x6, dec, sc x6 (16)
Rnd 8. (Sc x16) around (16) x18 rows
Rnd 26. (Sc, inc) around (24)
Rnd 27. Sc around (24)
Rnd 28. (Sc x5, inc) around (28) FO, leaving tail to sew side and front of legs to
body.
Stuff legs and place marker on top of each, approximately in the middle of leg
back. (this does not need to be exact as it is only for quick reference when needed
at time of sewing).
Cat – Body – starting at neck working down
Rnd 1. Ch 34, join and sc around. (34) x4 rows
Rnd 5. Sc, dec, sc x2, dec, sc x5, inc, sc x2, inc, sc x2,inc sc x2, inc, sc x5, dec, sc x2,
dec, sc (34)
Rnd 6. (Sc x4,inc) around (40)
Rnd 7. Sc around (40)
Rnd 8. (Sc x4, inc) around (48)
Rnd 9. Sc x2, inc, sc x13, inc, (sc x4, inc)x3, Sc x13, inc, sc x2 (54)
Rnd 10. Sc x6, inc, sc x13, inc, sc x12, inc, sc x13, inc, sc x 6 (58)
Rnd 11. Sc around (58) x2 rows
Rnd 13. (Sc x4, inc)x2, sc x11, inc, (Sc x4, inc)x3, sc x 11, inc, sc x4, inc, sc x4 (66)
Rnd 14. Sc, inc, sc x24, inc, sc x4, inc, sc x2, inc, sc x4, inc, sc x24, inc, sc (72)
Rnd 15. (Scx4, inc)x2, sc x21, inc, sc x8, inc, sc x21, (inc, sc x4)x2 (78)
Rnd 16. Sc around (78)
Rnd 17. (Sc x4, dec)x3, sc x8, inc, (sc x4, inc)x5, sc x8, (dec, sc x4)x3 (78)
Rnd 18. Sc around (78)
Rnd 19. Sc x2, (dec, sc x4)x2, dec, sc x8, (inc, sc x4)x2, inc, sc x8, (inc, sc x4)x2, inc,
sc x8, (dec, sc x4)x2, dec, sc x2 (78)
Rnd 20. Sc around (78) Secure yarn, do not FO or cut yarn.
Place marker in first stitch of this round (for left leg count) and last stitch of this
round (for right leg count). Count in both directions (including the middle marked
stitch for appropriate side), 17 stitches and place marker on right and left side of
the body. This is where you will attach back of front legs and sew around to the
front. Take each marked leg and move tail for sewing to one, two or even three
stitches past the center back marker, towards the outside of each leg. (Not
moving marker will create pigeon-toes, moving one stitch will point the toes
straight, moving 2 will give a more relaxed look, and moving 3 will point the toes
towards the outside – It all depends on the type of ‘personality’ or look you wish to
give your cat. You can even vary them!) Once you’ve decided, stitch legs to body
from the back of legs to front body markers. Secure inside tops of legs together
leaving 7 stitches each on back.
Now that the legs are attached, we can move on to completing the body. Attach
yarn at stitch where back left leg is sewn to body.
Rnd 21. Sc x44 around back of body. In the 7 stitches on back of right leg, sc x2, inc
x3, hdc x2. Into left leg, hdc x2, inc x3, sc x2. (64)
Rnd 22. Dec, sc x19, dec, sc x19, dec (around back). Dec, sc x4, hdc x8, sc x4, dec
(belly). (59)
Rnd 23. Dec, sc x38, dec, sc x17 (57)
Rnd 24. Dec, sc x36, dec, sc x17 (55)
Rnd 25. Sc around (55)
Rnd 26. Dec, sc x34, dec, sc x17 (53)
Rnd 27. Sc around (53)
Rnd 28. Sc x41, (inc, sc x5)x2 (55)
Rnd 29. Dec, sc x5, inc, sc x 6, inc, sc x9, inc, sc x6, inc, (sc x9, inc)x2, sc x3 (60)
Rnd 30. Sc around (60)
Rnd 31. Sc x2, inc, (sc x4, inc) x2, Sc x 14, inc, (sc x4, inc)x3, Sc x14, inc, sc x2 (68)
Rnd 32. Inc, (sc x5, inc)x2, Sc x20, inc, (Sc x5, inc)x3, Sc x10, inc, sc x5 (76)
Rnd 33. Sc around (76)
Rnd 34. Sc x2, dec, sc x8, dec, sc x24, (dec, sc x8)x3, dec, sc x6 (70)
Rnd 35. Sc x58, dec, sc x10 (69)
Rnd 36. Sc x7, dec, sc x32, dec, sc x16, dec, sc x8 (66)
Rnd 37. Sc x7, dec,(sc x9, dec)x5, Sc x2 (60)
Rnd 38. Sc x7, dec, (sc x8, dec)x5, Sc x1 (54)
Rnd 39. Sc around (54)
Rnd 40. Sc x45, dec, (sc, dec)x2, sc (51)
Rnd 41. Sc around (51)
Rnd 42. Sc, (dec, sc x4)x2, dec, sc x5, inc, sc x2, inc, sc x5, dec, (sc x4, dec)x2, sc x8
(47)
Rnd 43. (Dec, sc x4)x2, dec, sc x3, inc, sc, inc x2, sc, inc, sc x3, dec, sc x4, dec, sc x4,
dec, sc x7 (45)
Rnd 44. (Sc x2, dec)x3, sc, ch 8, skip 12 sc, sc, (dec, sc x2)x2, dec, sc x5, dec, sc x2
(34) ***Tail space made. You will crochet tail to body after body is finished.
Rnd 45. (Dec, sc x2)x2, dec, sc x8, dec, (Sc x2, dec)x3, sc 2 (27)
Rnd 46. Sc x2, dec, sc x2, dec x5, (Sc x2, dec)x2, sc, dec (18)
Stuff body before closing. (you will still be able to add stuffing to upper body
through neck, if necessary.
Rnd 47. (Sc, dec) around (12)
Rnd 48. Dec around (6) FO, weave tail through last 6 stitches and cinch to close. Tie
off and pull through to the inside.
Back feet – make two
> make all decreases invisible, both sc and hdc < > any inc or dec NOT marked hdc will be in sc <
Rnd 1. MC, sc x6 (6)
Rnd 2. Inc around (12)
Rnd 3. (Sc, inc) around (18)
Rnd 4. Hdc x4, sc x14 (18)
Rnd 5. a. Toe st x4, sc x5, inc, sc x2, inc, ch 1, TURN, Sc in same st (ch 1 does not
count as a stitch), Sc x6, ch 1, turn. (7 sc made). 5.b. Sc, ch 1, turn. Mark THIS row
and continue sc x7, ch 1 turn for 7 more rows. 5c. (right side)- Sc, dec, sc, dec, sc,
ch 1, turn (5) 5.d. Sc x5, ch 1, turn x3 more rows. 5.e. (right side) skip first sc, sc
x3, slpst into last sc.
Rnd 6. DO NOT TURN, sc down along side (13), sc x5 on foot, Dec x4 over toes, sc
x5 on foot, sc x13 up side, sc x4. (44)
Rnd 7. Sc x17, hdc dec x3, sc x17, dec x2 (39)
Rnd 8. Sc x16, hdc dec, hdc, hdc dec, sc x18 (37)
Rnd 9. Sc x12, sc dec, hdc dec x3, sc dec, sc x15 (32)
Rnd 10. Sc x11, sc dec, hdc dec x2, sc dec, sc x13 (28) Note: the front top of back
foot should now be in line with your marker placed on row 5.b. (which you can
now remove)
Rnd11. Sc around (28) FO, leave tail for sewing, stuff and bring tail to front center
as shown to temporarily hold stuffing.
***Sew back feet on AFTER you finish tail, as placement will be so much easier
and leave more room to work on tail!
Tail – Get ready to show some cat sass!
With feet facing you, attach yarn in bottom right corner of tail and start sc in next
stitch as shown. ***Stuff firmly as you go to fit the curve of the tail, as no wire is
necessary to get the sass this guy shows in his tail!
Rnd 1. Sc x20
Rnd 2. Sc x6, dec, sc x10, dec (18)
Rnd 3. (Sc, dec)x2, sc x12 (16)
Rnd 4. Sc around (16)
Rnd 5. Dec, sc x2, dec, sc x3, inc, sc x2, inc, sc x3 (16)
Rnd 6. Sc, dec, sc x13 (15)
Rnd 7. Dec x2, sc x4, inc, sc, inc, sc x4 (15)
Rnd 8. Dec, sc x4, inc, sc, inc, sc x4, dec (15)
Rnd 9. Sc, dec, sc x3, inc, sc x2, inc, sc x3, dec (15)
Rnd 10. Dec x2, sc x2, inc,sc, inc, sc, inc, sc x2, dec (15)
Rnd 11. Sc, dec, sc x4, inc x2, sc x4, dec (15)
Rnd 12. Sc, dec, sc x3, inc, sc, inc, sc x3, dec, sc (15)
Rnd 13. Dec x2, sc x3, inc x3, sc x3, dec (15)
Rnd 14. Sc, dec, sc x4, inc x2, sc x4, dec (15)
Rnd 15. Sc, dec, sc x3, inc, sc, inc, sc x3, dec, sc (15)
Rnd 16. Dec x2, sc x3, inc x3, sc x3, dec (15)
Rnd 17. Sc, Dec, sc x6, inc, sc x5 (15)
Rnd 18. (Sc, dec) x2, (sc, inc) x3, sc, dec (15)
Rnd 19. Dec, sc x4, inc, sc, inc, sc x4, dec (15)
Rnd 20. Dec x2, sc x3, inc x3, sc x3, dec (15)x8 rows
Rnd 28. Sc, inc, dec x2, inc, dec x2 , (inc, sc) x2 (15)
Rnd 29. Sc x3, inc, dec, inc, dec, dec, inc, dec, inc (15)
Rnd 30. Sc x2, inc, dec x2, inc x2, dec x2, inc, sc (15)
Rnd 31. Sc, inc, sc (dec, sc) x2, dec, sc, inc, sc, inc (15)
Rnd 32. (Sc, inc) x3, dec x4, inc (15) x3 rows
Rnd 35. Sc, inc x3, sc x2, dec x4, sc (14)
Rnd 36. Sc, (Sc, inc)x3, sc, dec x3 (14)
Rnd 37. Dec, sc x3, inc x3, dec x3 (13)
Rnd 38. Dec x2, sc , (inc, sc) x2, dec x2 (11)
Rnd 39. Dec x2, sc x3, dec x2 (7) F0, weave through remaining 7 stitches, cinch to
close, tie off and bring tail and knot to the inside.
Finishing
Back foot placement is easy, as the body was made to fit exactly. Just like the
front legs you can move them in or out to get your desired effect. I moved mine
slightly to the outside, as I wanted to see a bit more of those cute little kitty toes!
Below you can see the placement I chose for back feet and tail.