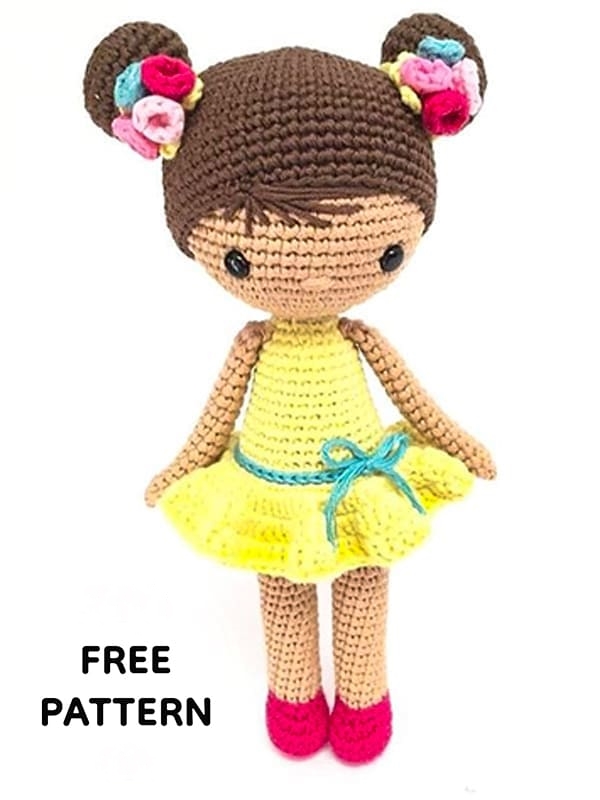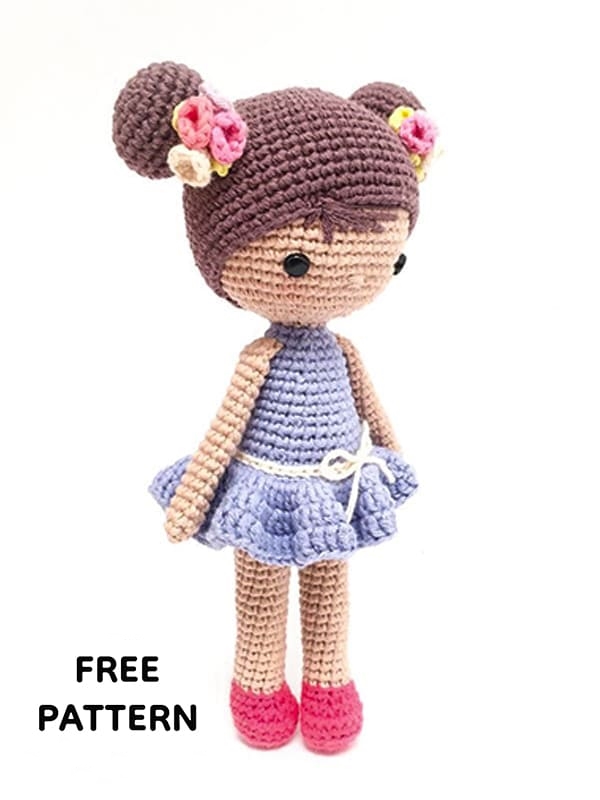
Cute Crochet Doll Chloe Amigurumi Free Pattern
Hello dear Amigurumi Followers
Today we share one free amigurumi crochet pattern again for you. As you know we share new amigurumi free patterns every day. The main crochets are amigurumi gazelles, amigurumi bears, amigurumi pola, amigurumi pandas, amigurumi penguins, amigurumi giraffes, amigurumi llama, amigurumi pigs, amigurumi bunny, amigurumi clowns, amigurumi lambs, amigurumi bees, amigurumi unicorns, amigurumi dolls, amigurumi foxes, amigurumi penguins, amigurumi dinosaurs, amigurumi elephants, amigurumi hippos, amigurumi monkeys, amigurumi cats, amigurumi dogs and more …
Todays daily new amigurumi free crochet pattern is amigurumi doll
I want to give you some informations about this pattern ;
If you enjoy making amigurumi, here I share this easy and free amigurumi pattern for you for free. Your kids will love these toys.
Materials
• 2 mm crochet hook
• Tapestry needle
• Pins
• Scissors
• 2 black 6 mm safety eyes or black embroidery floss.
• Stuffing
• Stitch markers
• Cotton yarn
Abbreviations
MR: Magic ring
Sc: Single crochet
St: Stitch
Slst: Slip stitch
Hdc: Half double crochet
Dc: Double crochet
Trc: Triple crochet
BLO: Back loop only
FLO: Front loop only
Inc: Increase
Dec: Decrease
Shoes
Rnd 1. 6 sc in MR (6)
Rnd 2. 6 inc (12)
Rnd 3. (1sc,inc)*6 (18)
Rnd 4. BLO- 18 sc (18)
Rnd 5. 18 sc (18)
Rnd 6. 5sc, 4dec, 5sc (14)
Rnd 7. 5sc, 2dec, 5sc (12)
Legs
Change to skin color.
Rnd 8. BLO- 12 sc (12)
Rnd 9-25. 12 sc (12)
Cut the yarn and fasten your work.
Joining the legs
Change to the underwear color.
1. Put the tips of the shoes together and put stitch markers on the points that will be joined. If you would like the feet to face to the front, don’t put the tips together.
2. Start with the right leg, begin at the stitch where your put the stitch marker.
3. Make ch 2 and join the other leg.
4. The legs should look this when you get to round 26. Stuff your legs and continue working in spiral.
Body
Rnd 26. 12 sc, 2sc in the ch 2, 12sc, 2sc in the ch 2 (28)
Rnd 27. 3sc, inc, (6sc,inc)*3, 3sc (32)
Rnd 28. (7sc,inc)*4 (36)
Rnd 29-31. 36 sc (36)
Change to dress color.
Rnd 32. 36 sc (36)
Rnd 33. BLO- 36 sc (36)
Rnd 34. 2sc, dec, (4sc,dec)*5, 2sc (30)
Rnd 35-36. 30 sc (30)
Rnd 37. (3sc,dec)*6 (24)
Rnd 38-43. 24 sc (24)
Rnd 44. 1sc, dec, (2sc,dec)*5, 1sc (18)
Rnd 45. (1sc,dec)*6 (12)
Do not cut the yarn, continue crocheting the head.
Head
Change to skin color.
Rnd 46. 12 sc (12)
Rnd 47. 12 inc (24)
Rnd 48. (3sc,inc)*6 (30)
Rnd 49. 2sc, inc, (4sc,inc)*5, 2sc (36)
Rnd 50. (5sc,inc)*6 (42)
Rnd 51. 3sc,inc, (6sc,inc)*5, 3sc (48)
Rnd 52. (7sc,inc)*6 (54)
Rnd 53-63. 54 sc (54)
Put the safety eyes between rounds 54 and 55, with a distance of 11 stitches between them.
Rnd 64. (7sc,dec)*6 (48)
Rnd 65. 3sc, dec, (6sc,dec)*5, 3sc (42)
Rnd 66. (5sc,dec)*6 (36)
Rnd 67. 2sc, dec, (4sc,dec)*5, 2sc (30)
Rnd 68. (3sc,dec)*6 (24)
Rnd 69. 1sc, dec, (2sc,dec)*5, 1sc (18)
Rnd 70. (1sc,dec)*6 (12)
Rnd 71. 6 dec (6)
Stuff the head firmly.
Fasten off and weave through the front loops of the 6 remaining stitches and pull tightly to close the hole.
Hair
Rnd 1. 6 sc in MR (6)
Rnd 2. 6 inc (12)
Rnd 3. (1sc,inc)*6 (18)
Rnd 4. 1sc, inc, (2sc,inc)*5, 1sc (24)
Rnd 5. (3sc,inc)*6 (30)
Rnd 6. 2sc, inc, (4sc,inc)*5, 2sc (36)
Rnd 7. (5sc,inc)*6 (42)
Rnd 8. 3sc, inc, (6sc,inc)*5, 3sc (48)
Rnd 9. (7sc,inc)*6 (54)
Rnd 10-19. 54 sc (54)
Rnd 20. (7sc,dec)*6 (48)
Hair bun (Make 2)
Rnd 1. 6 sc in MR (6)
Rnd 2. 6 inc (12)
Rnd 3. (1sc,inc)*6 (18)
Rnd 4. (2sc,inc)*6 (24)
Rnd 5-8. 24 sc (24)
Rnd 9. 2sc, dec (18)
Leave a long yarn tail. Stuff the hair bun and sew to the hair.
Arms (Make 2)
Don’t stuff the arms.
Rnd 1. 4 sc in MR (4)
Rnd 2. 4 inc (8)
Rnd 3-17. 8 sc (8)
Fold and join with 4 sc.
Leave a long yarn tail to sew to the body.
Skirt
Close each round with slst.
Begin making the skirt in the front loop of round 33, start at the back with a standing sc.
Rnd 1. 36 sc (36)
Rnd 2. (ch 3, 1 dc in the same stitch), 35 inc-dc (72)
Rnd 3. ch 3, 1 inc-dc in the same stitch, (1 dc, 1 inc-dc)*35 (108)
Rnd 4. 108 dc (108)
When you have finished the skirt, add a yarn of another color and make slst around round 34 (just above the skirt).
Start right where you want the tie to be, leaving a long yarn tail at the beginning and end that will serve to make a bow.
Flowers
For each hair bun make 4 flowers in different colours.
Rnd 1. 4 sc in MR (4)
Rnd 2. 4 inc (8)
Fasten off your work, cut the yarn and leave a long yarn tail.
Cut the excess yarn tail of the magic ring and with a needle insert the long yarn tail inside the flower, just through the center of the magic ring.
Join the four flowers by tying the remaining yarn tails into a knot, keeping the knot as close to the flowers as possible.
Leaves
Make 5 or 6 picot of ch 5 in a magic ring.
In the following pictures ı explain how it is done.
1. Make ch 5 from the magic ring.
2. Make a slst into the first ch.
3. Make another slst in the magic ring.
4. Repeat this step 5 or 6 more times, depending on how many leaves you like.
5. Don’t completely close the magic ring, pull all the yarn tails left on the flower bouquet through it.
6. Now close the magic ring. Make sure the knot made by tying the flowers together is on the outside. Cut the excess yarn tails from the flowers. Do not cut the yarn tails from the leaves, you will need these later. You can use a drop of glue to fix the bouquet if you want to.
Use the green yarn tails from the leaves to attach the bouquets to the hair bun. You can wrap the yarn around the bun a few times to make it look prettier.
To finish, embroider a fringe and a nose.
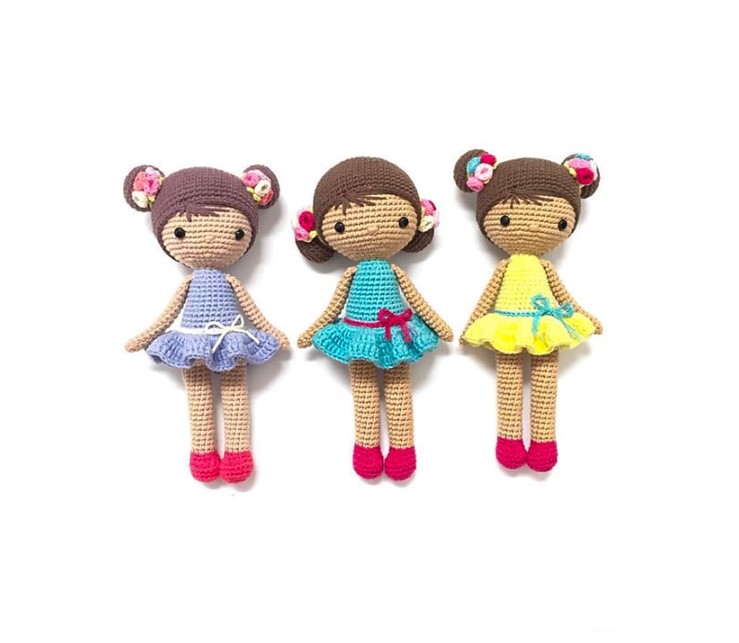
More Amigurumi Doll İdeas