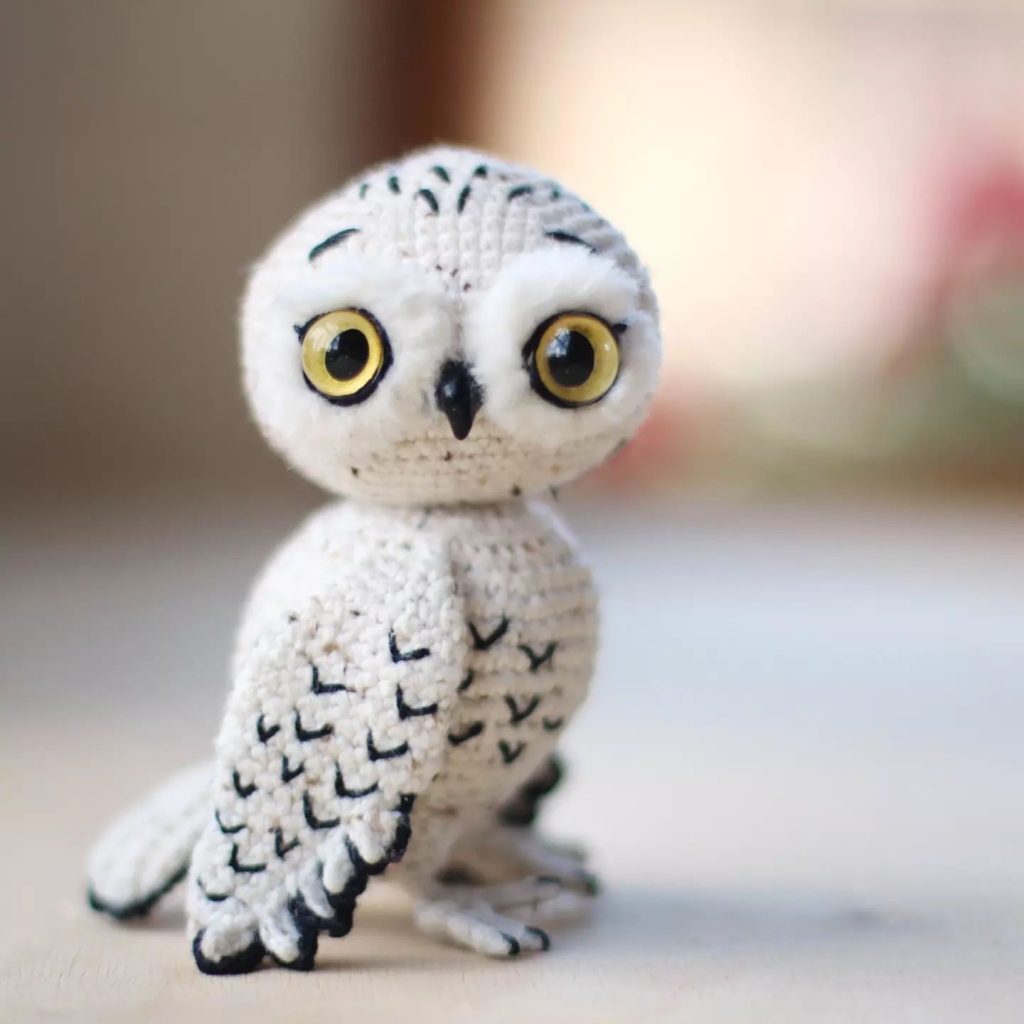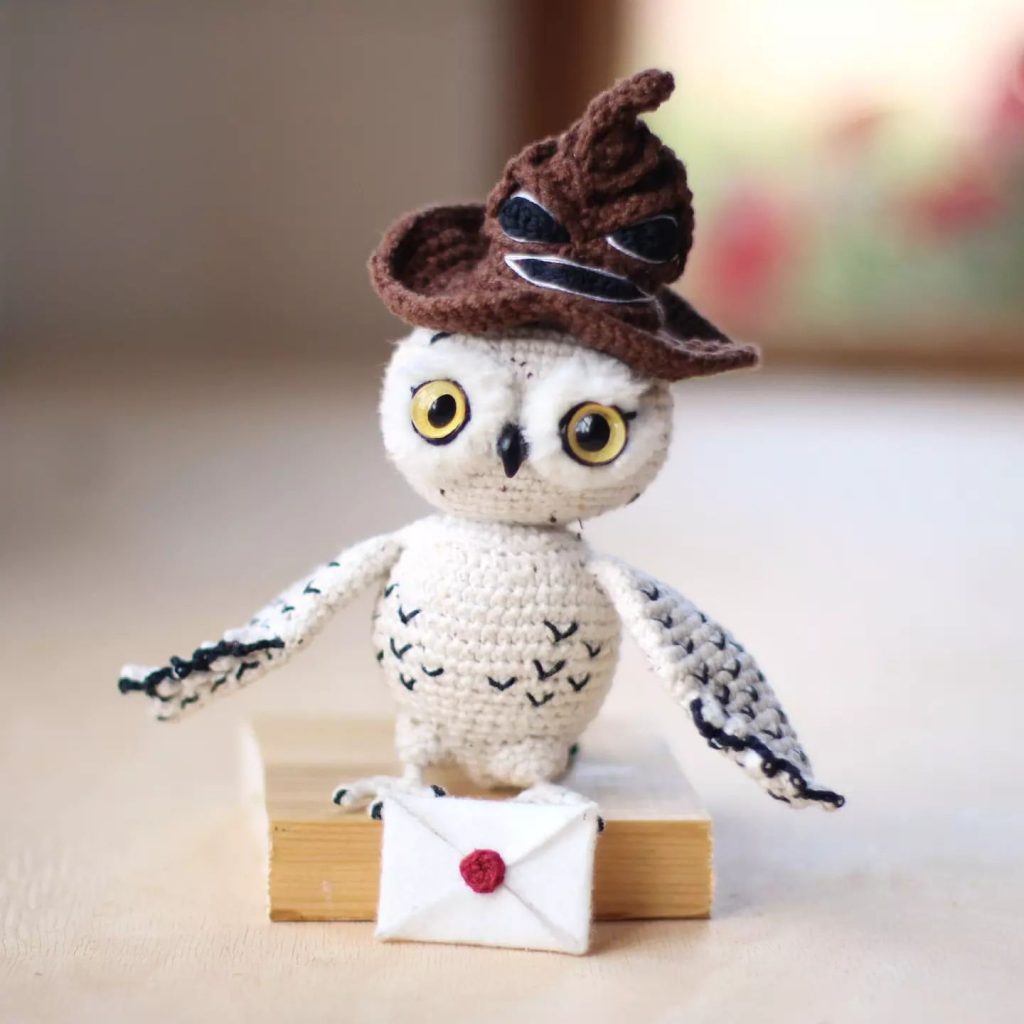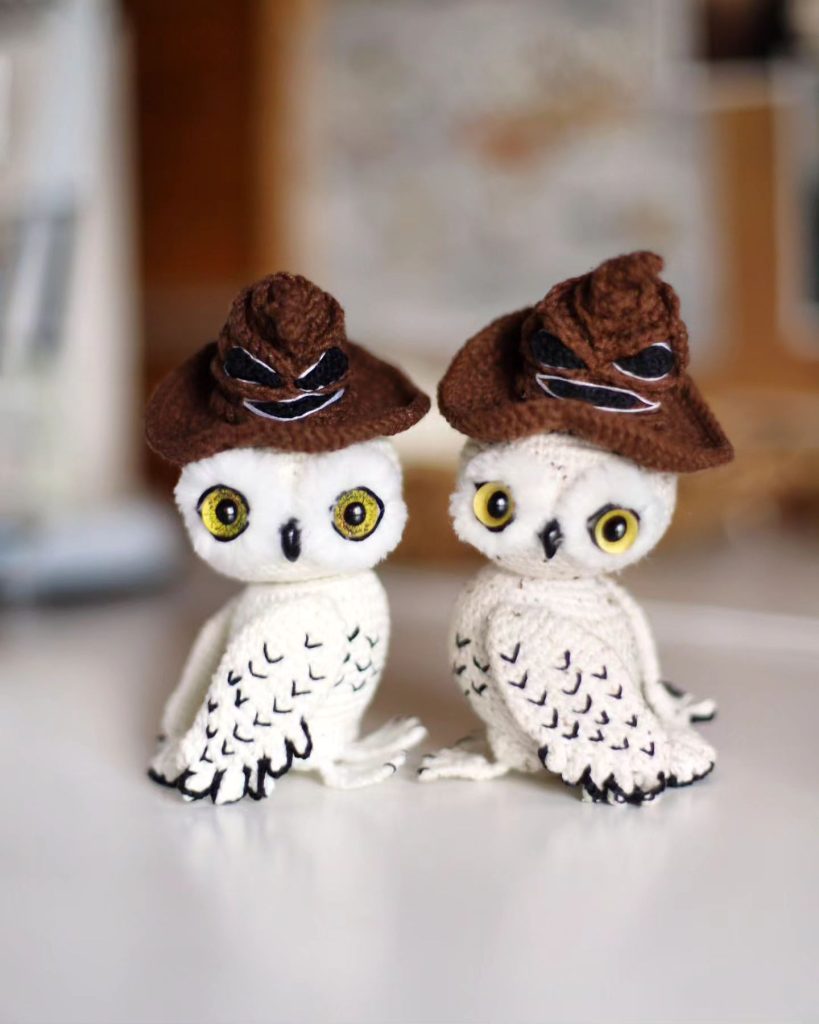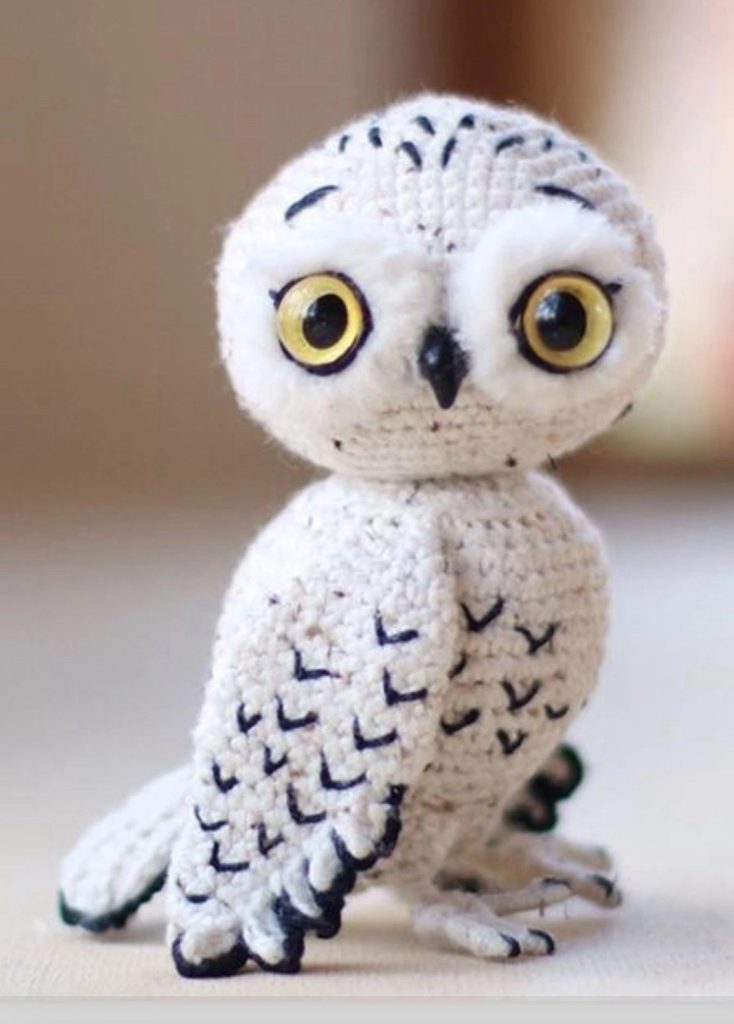
Cute Crochet Owl Hedwig Amigurumi Free Pattern
Hello dear Amigurumi Followers
Today we share one free amigurumi crochet pattern again for you. As you know we share new amigurumi free patterns every day. The main crochets are amigurumi gazelles, amigurumi bears, amigurumi pola, amigurumi pandas, amigurumi penguins, amigurumi giraffes, amigurumi llama, amigurumi pigs, amigurumi bunny, amigurumi clowns, amigurumi lambs, amigurumi bees, amigurumi unicorns, amigurumi dolls, amigurumi foxes, amigurumi penguins, amigurumi dinosaurs, amigurumi elephants, amigurumi hippos, amigurumi monkeys, amigurumi cats, amigurumi dogs and more …
Todays daily new amigurumi free crochet pattern is amigurumi owl
I want to give you some informations about this pattern ;
If you enjoy making amigurumi, here I share this easy and free amigurumi pattern for you for free. Your kids will love these toys.
Materials and tools
Hooks 1,75 mm and 1,5 mm;
12 mm hemispheres glass eyes on shanksloops. Link for the eyes that I used:
http://www.adelkawalka.com/02043
Black, white and maroon threads mouline;
Pin or marker;
Yarn needle (thick needle with blunt end);
Needles for cutting – with a bead on the
end (for fixing parts before sewing);
Synthepus for filling;
Scissors;
Needle;
Round-nosepliers;
Cotter pin T-shaped 25 х 2.0 mm;
Shim 3х20 mm;
Disk, diameter 20 mm;
Fishing line;
Rug brush (for combing);
CONVENTIONS
l – loop = chain;
sc – single crochet;
dc – double crochet;
tr – treble crochet;
sl st – slip stitch;
inc – increase;
dec – decrease;
(…l) – total number of loops in a round;
[…]xN – repeat what is indicated in round brackets N times
EYES, 2 pcs
1: 2 loops, 6sc in 2nd loop from hook (amigurumi ring) (6l)
2: [inc]х6 (12l)
3: [sc, inc]х6 (18l)
Cut and fix the thread, leaving a long end for sewing. Turn the detail wrong side out
and comb it with the rug brush. Cut it slightly to get achieve the desired shape
BEAK
OPTION 1: POLYMER CLAY MOLDING
Separate a small piece of polymer clay and roll it into a ball. Then roll the top of the
ball with two fingers to get a cone. Press down the base of the cone to make it flat.
Bend the beak and make nostrils with a «needle eye»
Bake the beak in the oven by placing it in the baking sleeve for 20 minutes at 130
degrees. Allow the product to cool completely. Wash your hands with soap.
Take toothpick and cut it in half. Gently smear the flat end of the
toothpick with glue and stick beak to it.
Holding a toothpick, varnish the products with glossy glaze using a synthetic brush. Be careful – don’t touch the product with your hands. Stick the
toothpick into the dishwashing sponge and leave to dry for 12 hours.
Pull out toothpick from product.
OPTION 2: CROCHETED BEAK
If you don’t want to sculpt the beak from polymer clay, then crochet it with a hook 1,5
mm using black mouline threads.
1: 2 loops, 3sc in 2nd loop from hook (amigurumi ring) (3l)
2: 3sc (3l)
3: sc, inc, sc (4l)
4: [sc, inc]х2 (6l)
Cut and fix the thread, leaving a long end for sewing.
HEAD
1: 2 loops, 6sc in 2nd loop from hook (amigurumi ring) (6l)
2: [inc]х6 (12l)
3: [sc, inc]х6 (18l)
4: [2sc, inc]х6 (24l)
5: [3sc, inc]х6 (30l)
6: [4sc, inc]х6 (36l)
7: [5sc, inc]х6 (42l)
8: [6sc, inc]х6 (48l)
9: [7sc, inc]х6 (54l)
10: [8sc, inc]х6 (60l)
11-18: 60sc (60l)
19: [8sc, dec]х6 (54l)
20: [7sc, dec]х6 (48l)
21: [6sc, dec]х6 (42l)
22: [5sc, dec]х6 (36l)
23: [4sc, dec]х6 (30l)
Mark the location of the eyes with the needles for cutting – between rounds 15 and
16, the distance between them is approx 9 stitches
Sew fluffy details to the head. Continue crochet the head.
24: [3sc, dec]х6 (24l)
Start stuffing the head with synthepus.
Attention! If you decide to use safety eyes instead of glass eyes, then they must be
inserted and secured before filling! If you are using glass eyes, then follow the
instructions below.
25: [2sc, dec]х6 (18l)
26: [sc, dec]х6 (12l)
EYES ATTACHMENT
Cut off at least 20 cm (7.8 inches) fishing line and insert into the eye loop.
Reach out the eye to the middle of the fishing line and tie a knot
Use round-nose pliers to flatten the loop. Thread both ends of the line
through the yarn needle. Insert the needle into the location of the eye and lead it out
into the opening of the head. Pull the ends of the fishing line through
the crocheted canvas, stepping back one loop from each other
Tie several knots
Embroider the outline around the eyes using black threads floss in two folds – make
one stitch, divide it into 2 threads, placing one on top and other on the bottom,
tighten the stitch. Separate one thread and fasten with a needle
the thread in two places.
Fasten the thread by tying a knot. Embroider eyelashes.
Cut 2 pieces of the black threads floss about 0.5 cm (0.2 inches) long. Attach to the
forehead and arrange symmetrically, mark with the pins the beginning and end of
the segment. Embroider eyebrows.
Glue the beak with superglue (or sew) below 14th round of the head.
Insert cotter pin into shim. Place cotter pin with shim in the hole head.
27: [dec]х6 (6l)
Trim the thread. Pass the thread through all the loops using the yarn needle. Tighten
and secure.
BODY
1: 2 loops, 10sc in 2nd loop from hook (amigurumi ring) (10l)
2: [inc]х10 (20l)
3: [sc, inc]х10 (30l)
4: [2sc, inc]х10 (40l)
5: [19sc, inc]х2 only through back loops (42l)
6: [6sc, inc]х6 (48l)
Insert cotter pin in middle of body. Put the disk on cotter pin and
wrap the ends in the “rings” with the help of round-nose pliers.
7-11: 48sc (48l)
12: 12sc, [2sc, dec]х6, 12sc (42l)
13: 42sc (42l)
14: 9sc, [2sc, dec]х6, 9sc (36l)
15: 36sc (36l)
16: 6sc, [2sc, dec]х6, 6sc (30l)
17: 30sc (30l)
18: 3sc, [2sc, dec]х6, 3sc (24l)
Start stuffing the body with synthepus.
19: 24sc (24l)
20: 3sc, [sc, dec]х6, 3sc (18l)
21: 3sc, [dec]х6, 3sc (12l)
Fill the body to the end.
22: [dec]х6 (6l)
Trim the thread. Pass the thread through all the loops using the yarn needle. Tighten
and secure.
FEET, 2 pcs
OPTION 1: WIRE FRAME
Cut 2 pieces at least 20 cm (7,9 inches) of decorative wire. Step back 5 cm from the
edge and bend the wire using round-nose pliers to form fingers (fingers are about 1
cm long, Roll the two ends of the wire together. Use
round-nose pliers, “flatten” the fingers, leaving a small hole at the end of each finger.
Insert the wire feet into the body between rounds 18 and 19, the distance between
them is approx 7 stitches.
Sew the base of the feet to the body.
OPTION 2: CROCHETED FEET
If you don’t want to make wire feet, then crochet it with a hook 1,75 mm using Yarn
B.
1: 2 loops, 6sc in 2nd loop from hook (amigurumi ring), sl st in 1st sc (6l)
2: Crochet all round only through front loops – 3 loops, turning, 2 sl st starting from
the 2nd loop from the hook (1st finger); 2 sl st; 3 loops, turning, 2 sl st starting from
the 2nd loop from the hook (2nd finger); sl st; 4 loops, turning, 3 sl st starting from
the 2nd loop from the hook (3rd finger); sl st; 3 loops, turning, 2 sl st starting from the
2nd loop from the hook (4th finger); 2 sl st
3: Flip. Pull the loop to the wrong side. Crochet all
round only through back loops remaining from the previous round – [sc, dec.]x2 (4l)
4: [sc, inc]х2 (6l)
Cut and fix the thread, leaving a long end for sewing. Sew the feet to
the base and then to the body in the same way as for option 1.
WINGS
Each wing has its own scheme.
RIGHT WING (by the observer)
1: 2 loops, 6sc in 2nd loop from hook (amigurumi ring) (6l)
2: [2sc, inc]х2 (8l)
3: [sc, inc]х4 (12l)
4: 12sc (12l)
5: [2sc, inc]х4 (16l)
6: 16sc (16l)
7: [7sc, inc]х2 (18l)
8: 18sc (18l)
9: [8sc, inc]х2 (20l)
10: 20sc (20l)
11: [8sc, dec]х2 (18l)
12: 10sc, 3 loops, turning, 2sc, sl st in the same loop (in which the last sc was
crocheted before the chain, we got a feather), 8sc (18l)
Attention! Further, the loops of the feathers of the previous round should be
skipped and not taken into account when calculating the total number of loops in a
round.
13: [7sc, dec]х2 (16l)
14: 10sc, 3 loops, turning, 2sc, sl st in the same loop, 6sc (16l)
15: [6sc, dec]х2 (14l)
16: 10sc, 4 loops, turning, 3sc, sl st in the same loop, 4sc (14l)
17: [5sc, dec]х2 (12l)
18: 10sc, 4 loops, turning, 3sc, sl st in the same loop, 2sc (12l)
19: [4sc, dec]х2 (10l)
20: 10sc, 4 loops, turning, 3sc, sl st in the same loop, sc (10l)
21: [dec]х5 (5l)
Cut and fix the thread, leaving a long end for sewing. Don’t close the hole.
LEFT WING (by the observer)
1: 2 loops, 6sc in 2nd loop from hook (amigurumi ring) (6l)
2: [inc, 2sc]х2 (8l)
3: [inc, sc]х4 (12l)
4: 12sc (12l)
5: [inc, 2sc]х4 (16l)
6: 16sc (16l)
7: [inc, 7sc]х2 (18l)
8: 18sc (18l)
9: [inc, 8sc]х2 (20l)
10: 20sc (20l)
11: [dec, 8sc]х2 (18l)
12: 8sc, 3 loops, turning, 2sc, sl st in the same loop (in which the last sc was crocheted
before the chain, we got a feather), 10sc (18l)
Attention! Further, the loops of the feathers of the previous round should be
skipped and not taken into account when calculating the total number of loops in a
round.
13: [dec, 7sc]х2 (16l)
14: 7sc, 3 loops, turning, 2sc, sl st in the same loop, 9sc (16l)
15: [dec, 6sc]х2 (14l)
16: 6sc, 4 loops, turning, 3sc, sl st in the same loop, 8sc (14l)
17: [dec, 5sc]х2 (12l)
18: 5sc, 4 loops, turning, 3sc, sl st in the same loop, 7sc (12l)
19: [dec, 4sc]х2 (10l)
20: 4sc, 4 loops, turning, 3sc, sl st in the same loop, 6sc (10l)
21: [dec]х5 (5l)
Cut and fix the thread, leaving a long end for sewing. Don’t close the hole.
Mark with the needle for cutting the location of the wings between 5 and 6 round of
the body, the distance between them is approx 18 stitches
WIRE FRAME TO THE WINGS
Insert the yarn needle into the body at the wings attachment point. Take a piece of
wire (approximately 40 cm – 15.7 inches long). Pull the wire through the body use a
needle. Pull the crocheted wings to the wire
Bite off excess wire and bend the end into a “loop” using round-nose pliers. Trim the thread. Pass the thread through all the loops using the yarn
needle. Tighten and secure.
Move the thread to the base of the win. Sew the wing to the body
Do the same steps with the second wing.
TAIL
Attention! Crochet the tail through back loops only.
1: 9 loops, turning, 8sc (starting from the 2nd loop from the hook) (8l)
2-9: 1 loops, turning, 8sc only through back loops (8l)
Cut and fix the thread, leaving a long end for sewing. Pull the thread through 5 side
loops with a needle. Tighten and secure the thread.
Sew the tail to the body to give the toy balance
SPOTS
For my owl, I embroidered spots with black threads floss, I only used toning to draw
claws on the feet.
OPTION 1: TONING
Attention! Before drawing spots on a toy, first practice on a sample).
For toning, use black acrylic paint for textile and a round 3/0 synthetic paint brush.
To make the spots look as natural as possible, make them of different sizes.
OPTION 2: EMBROIDERY
The spots can be embroidered with black threads of mouline. To embroider a check
mark, you need to make a straight stitch, then insert the needle in the middle 1 row
lower and fasten the thread.
Embroider the spots on the head with straight stitches. Embroider
the check marks on the belly and on both sides of the wings.
Crochet the feathers on the wings around with a 1,5 mm hook:
Right wing: [sl st, 3 loops, sl st, 3 loops]x2, [2 sl st, 4 loops, sl st, 4 loops]x3, sl st
Left wing: [2 sl st, 4 loops, sl st, 4 loops]x3, [sl st, 3 loops, sl st, 3 loops]x3, sl st
Embroider the check marks on the back.
Crochet the tail around with a 1,5 mm hook:
Tail: sl st, 9 loops, sl st, 2 loops, [sl st, 3 loops]x3, sl st, 2 loops, sl st, 9 loops, sl st
Draw the claws on the feet.
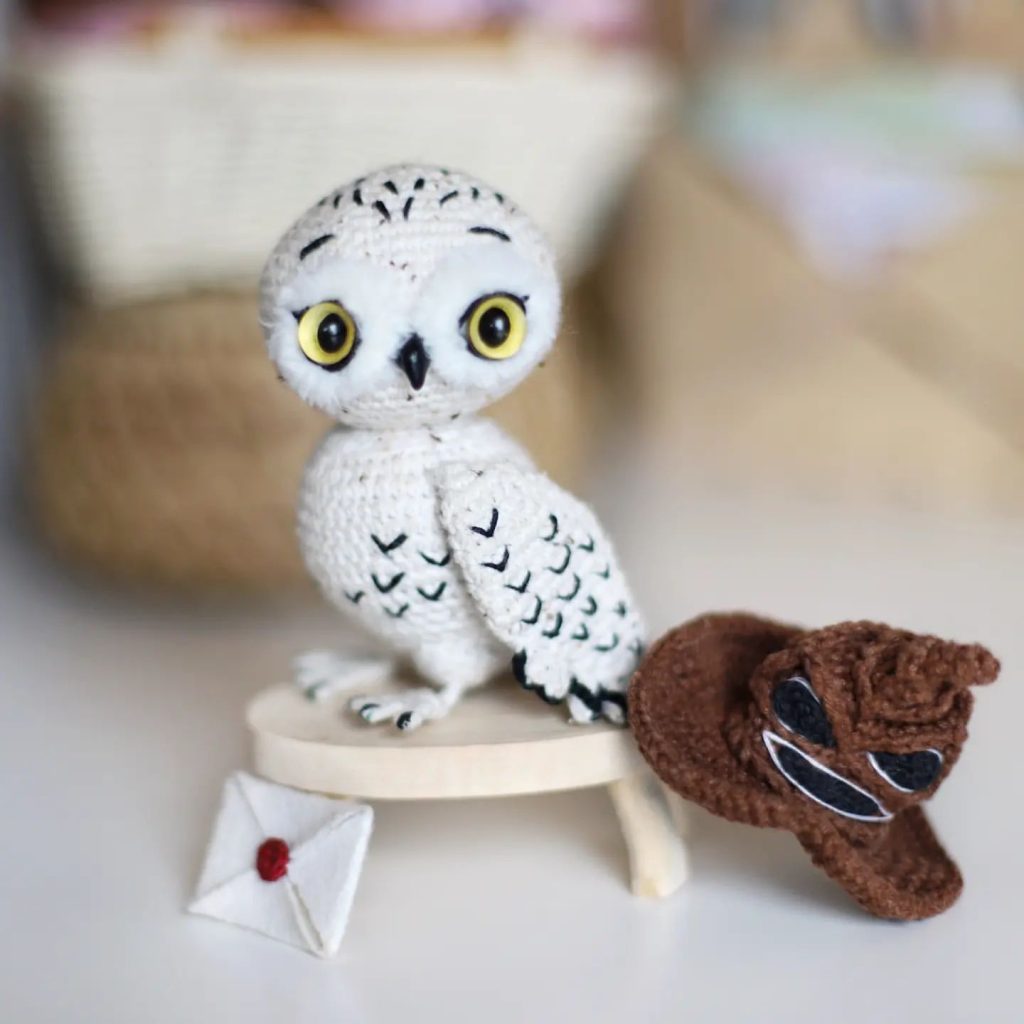
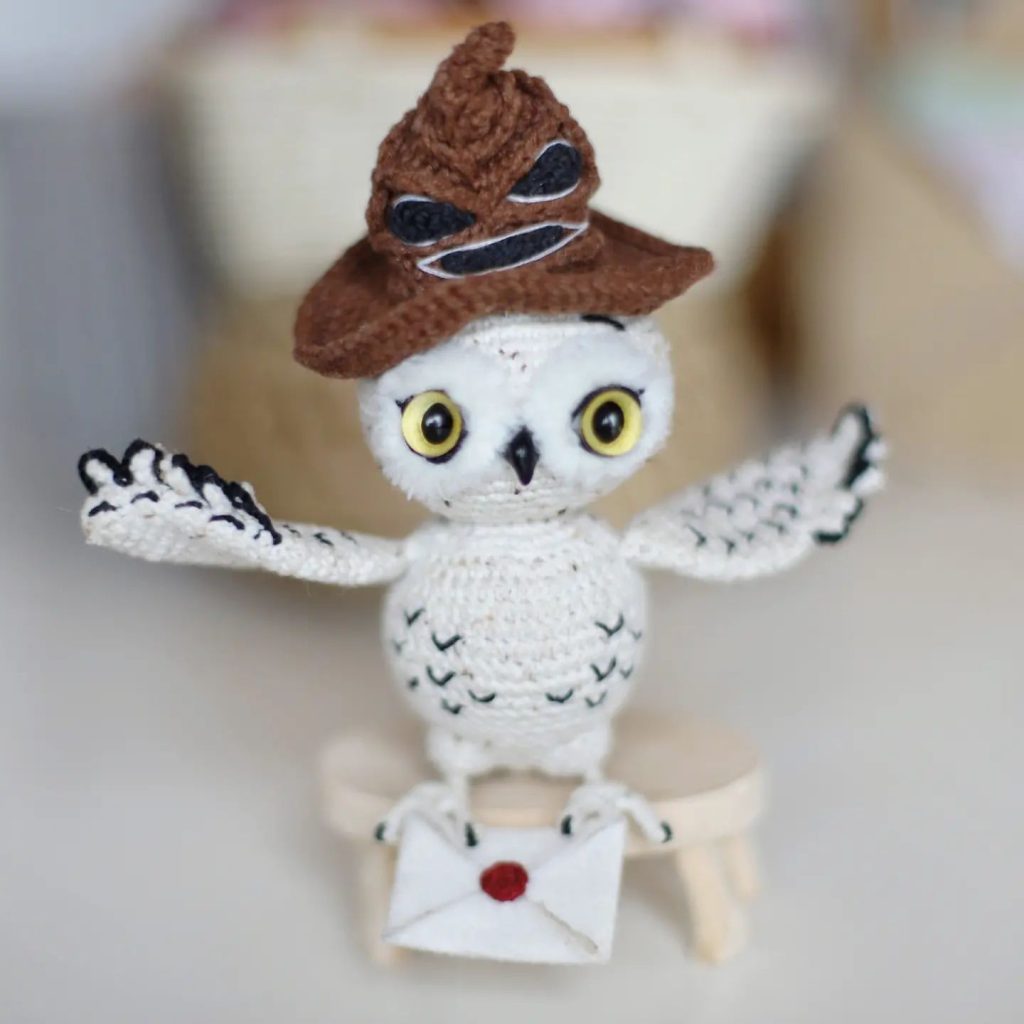
HAT
1: 2 loops, 3sc in 2nd loop from hook (amigurumi ring) (3l)
2: 3sc (3l)
3: inc, 2sc (4l)
4: 4sc only through back loops (4l)
5: inc, 2sc, inc (6l)
6: [sc, inc]х3 (9l)
In the next round, go to the 4th round to crochet a fold, and then come back.
7: 4sc through front loops left in the 4th round. Come back to crochet
8th round.
8: [2sc, inc]х3 (12l)
9: 12sc only through back loops (12l)
10: [sc, inc]х6 (18l)
In the next round, go to the 9th round to crochet a fold, and then come back.
11: 12sc through front loops left in the 9th round. Come back to
crochet 12th round.
12: [2sc, inc]х6 (24l)
13: 24sc only through back loops (24l)
14: 6sc, 12dc, 6sc (24l)
In the next round, go to the 13th round to crochet a fold, and then come back.
15: 24sc through front loops left in the 13th round. Come back to
crochet 16th round.
16: 6sc, 12dc, 6sc (24l)
17: 24sc only through back loops (24l)
18: 24sc (24l)
In the next round, go to the 17th round to crochet a fold, and then come back.
19: 24sc through front loops left in the 17th round. Come back to
crochet 20th round.
20: 24sc (24l)
21: [3sc, inc]х6 only through back loops (30l)
In the next round, go to the 21th round to crochet a fold, and then come back.
22: 24sc through front loops left in the 21th round. Come back to
crochet 23th round.
23: [4sc, inc]х6 (36l)
24: [2sc, inc]х12 (48l)
25: [sc, inc]х24 (72l)
26-27: 72sc (72l)
28: 72 sl st (72l)
Cut and fix the thread, leaving a long end. Hide the thread in the crocheted fabric,
then move it inside the hat. Do not cut the thread.
Crochet the eyes and the mouth with 1.5 mm hook using black threads floss.
EYES, 2 pcs
1: 8 loops, turning, tr in the 3rd loop from the hook, 2dc, sc, 2 sl st (6l)
MOUTH
1: 11 loops, turning, 3 sl st, 4sc, 3sl st (10l)
Sew the eyes and mouth to the hat
Embroider the outline around the eyes and mouth using white threads floss – make
one stitch, divide it in half, placing one on top and other on the bottom, tighten the
stitch.
Attach the thread (that we left earlier) to the upper fold above the eye with sl st.
Crochet 3 loops, attach the thread to the lower fold under the eye with sl
st. Repeat the same steps for the other eye.
Fasten and cut the thread. Try on a hat for an owl
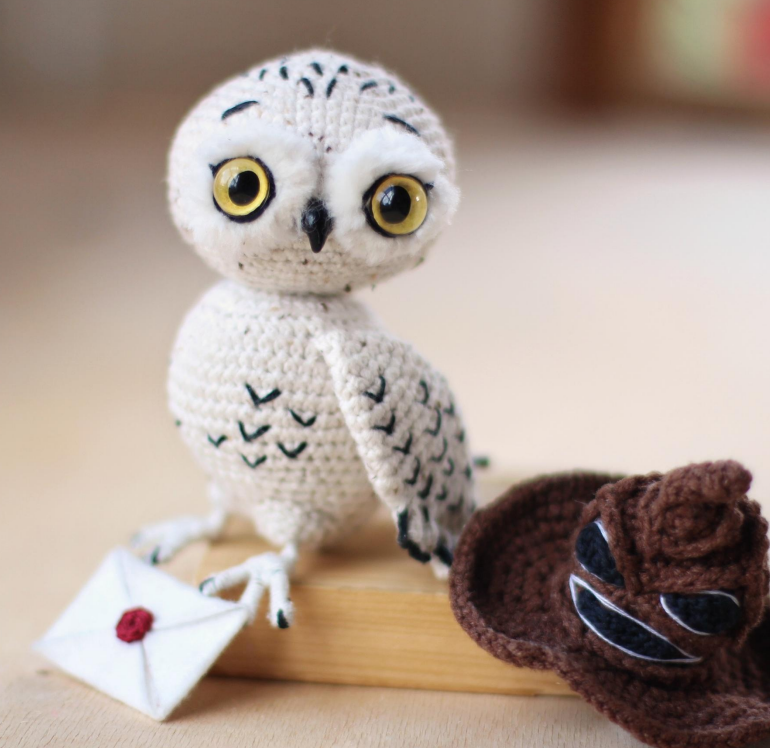
LETTER
Cut a rhombus out of paper according to the dimensions shown in the drawing
below.
Circle the rhombus on the white felt and cut it out. Glue double tape
in the center of the rhombus and fold the envelope.
STAMP
Crochet a stamp with 1.5 mm hook using black threads floss.
1: 2 loops, 6sc in 2nd loop from hook (amigurumi ring) (6l)
Cut and fix the thread, leaving a long end for sewing.
Sew the stamp carefully to the envelope
Congratulations, you did a great job and created a small miracle! Embrace your owl!
More Amigurumi Owl İdeas