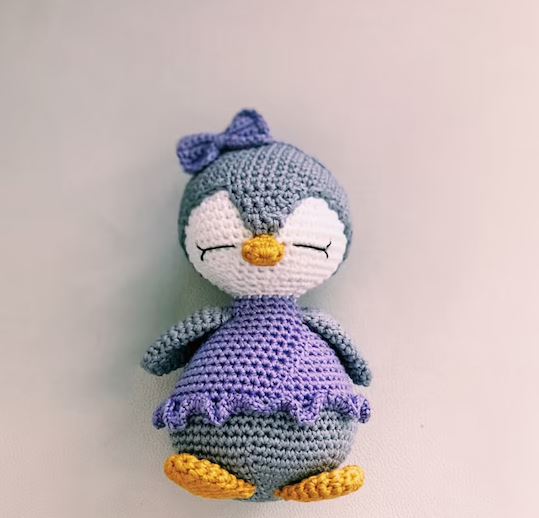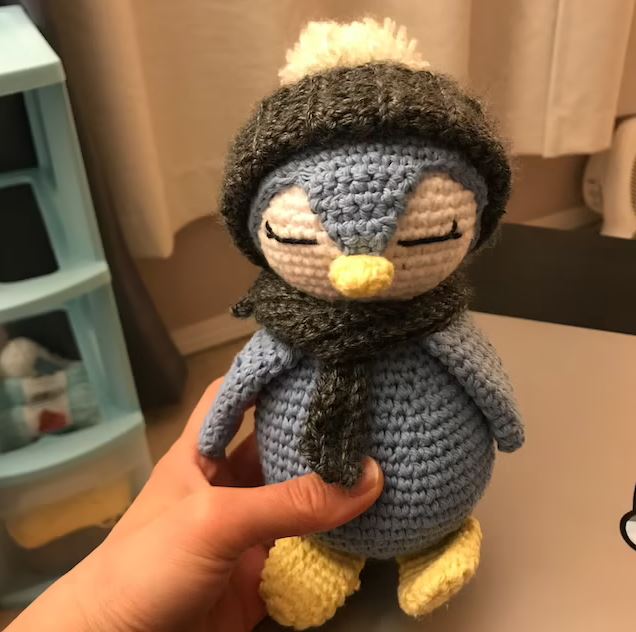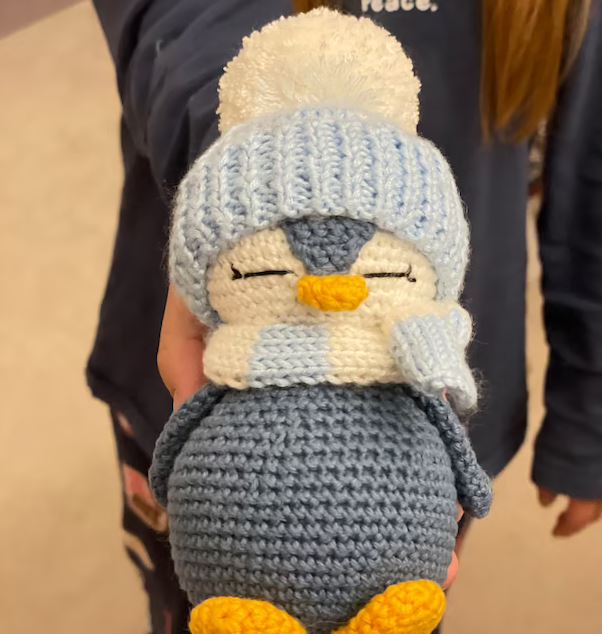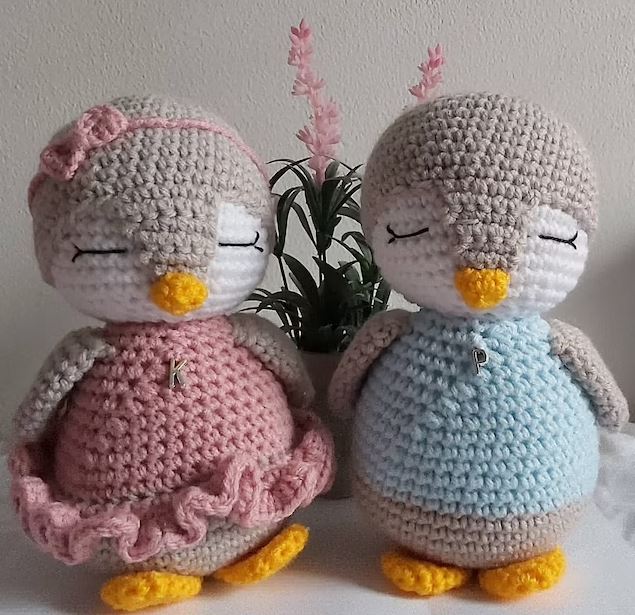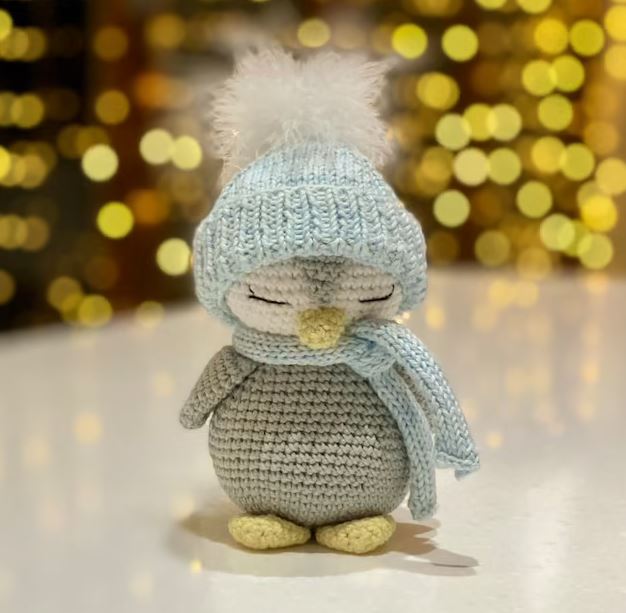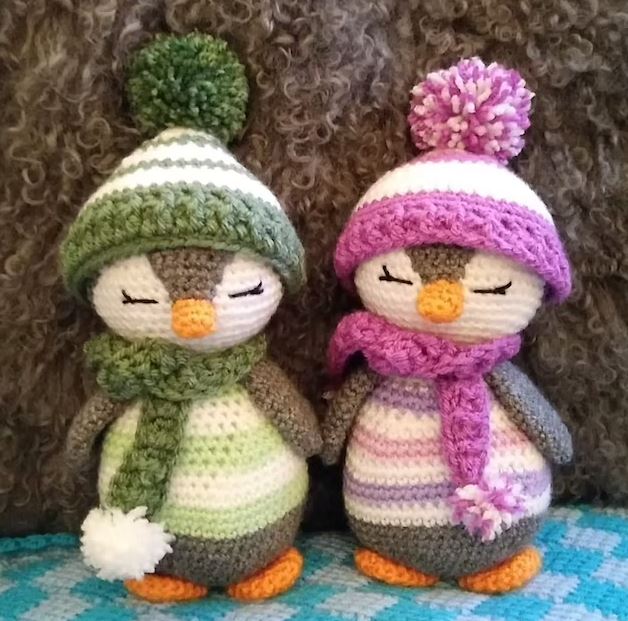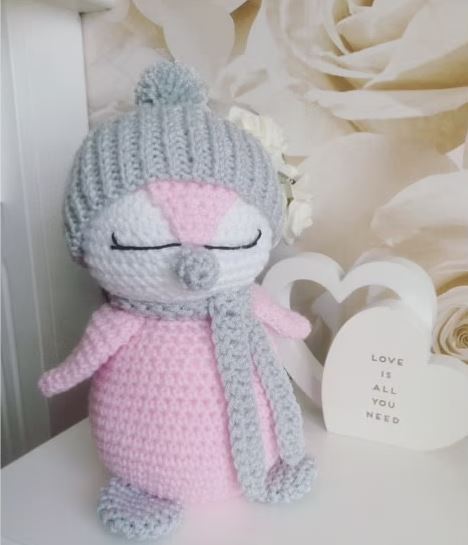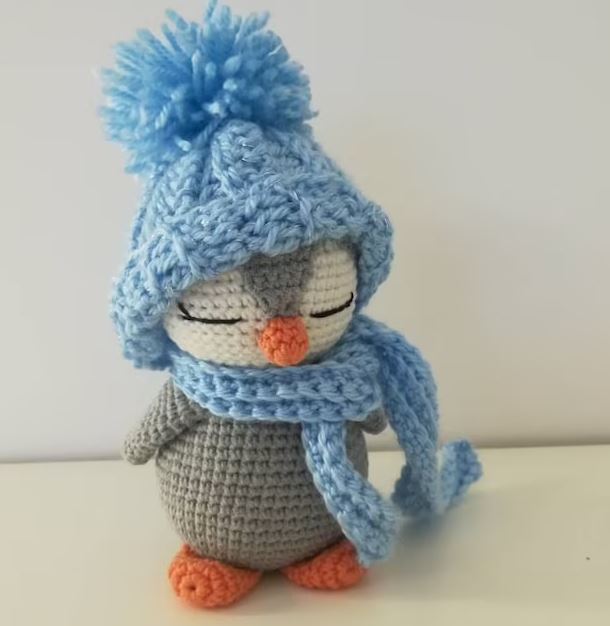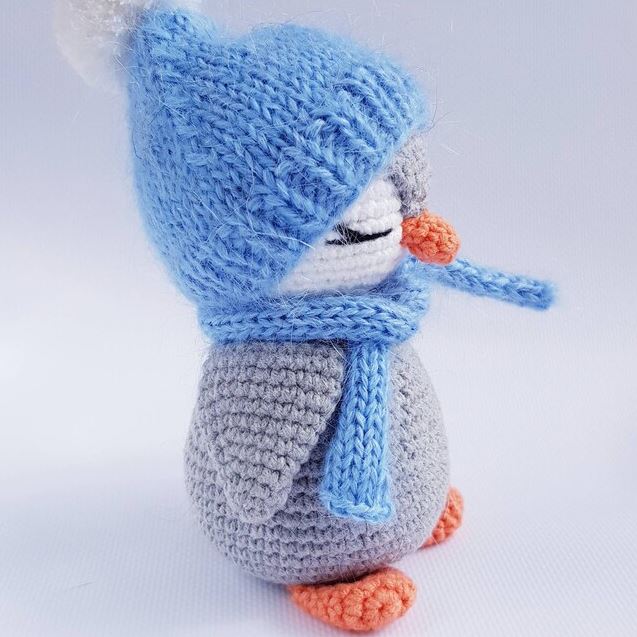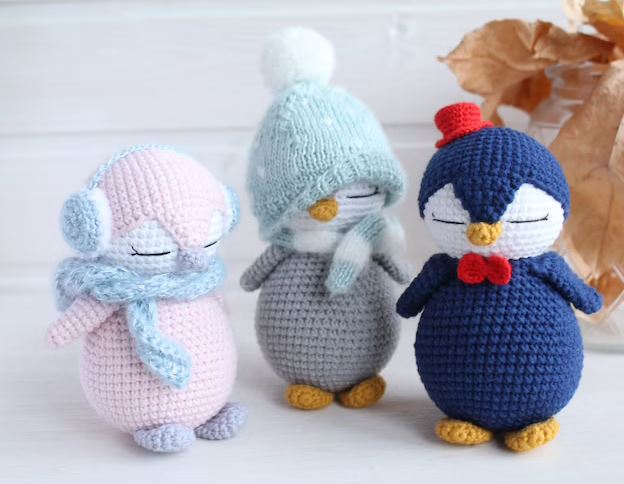
Amigurumi Crochet Penguin Free Pattern
Hello dear Amigurumi Followers
Today we share one free amigurumi crochet pattern again for you. As you know we share new amigurumi free patterns every day. The main crochets are amigurumi gazelles, amigurumi bears, amigurumi pola, amigurumi pandas, amigurumi penguins, amigurumi giraffes, amigurumi llama, amigurumi pigs, amigurumi bunny, amigurumi clowns, amigurumi lambs, amigurumi bees, amigurumi unicorns, amigurumi dolls, amigurumi foxes, amigurumi penguins, amigurumi dinosaurs, amigurumi elephants, amigurumi hippos, amigurumi monkeys, amigurumi cats, amigurumi dogs and more …
Todays daily new amigurumi free crochet pattern is amigurumi penguin
I want to give you some informations about this pattern ;
If you enjoy making amigurumi, here I share this easy and free amigurumi pattern for you for free. Your kids will love these toys.
Materials
– Main color yarn for body: Yarn Art JEANS (160 m (175 yd)/ 50g (1.75 oz), 55% cotton/45% acrylic), color №46 (dark gray) for gray penguin, color №74 (pale pink) for pink penguin. For beak and legs: Gazzal baby cotton (165 m (180 yd)/ 50g (1,76 oz), 60% cotton/40% acrylic , color №3347 (mustard) for gray penguin, color №3430 (dark gray) for pink penguin.
– Crochet hook 2,25 mm (metal US B/1, GB 13), knitting needles 2,5 mm
– Fiber filling
– Thread of black color for embroidery of eyes
– Yarn neddle for sewing details, scissors, pins.
– Any wool, semi wool, acrylic or other yarn for knitting accessories.
Abbreviations
MR – Magic ring
ch – chain
sc – single crochet
slst – slip stitch
inc – increase (2 sc in one st)
dec – invisible decrease (crochet next 2 st together)
st/sts – stitch/stitches
BLO – back loop only
R – round/row
()*… – repeat instructions in blackets … times
Number in () at the end of the round indicates number of st in that round
k. – knit
p. – purl
K2tog – knit two (2) stitches together
edge st – edge stitch
Notes
– Do not join rounds; work in a continuous spiral unless otherwise stated.
– Fasten off your work always with needle join and you will get a neat result.
– Stuff your amigurumi as you go.
– Mostly, I embroider muzzles using embroidery floss.
– Use a stitch marker or a piece of yarn to mark the beginning of a round.
– Toys measures ~ 13 – 14 cm (5 – 5.5 inches) using the materials described.
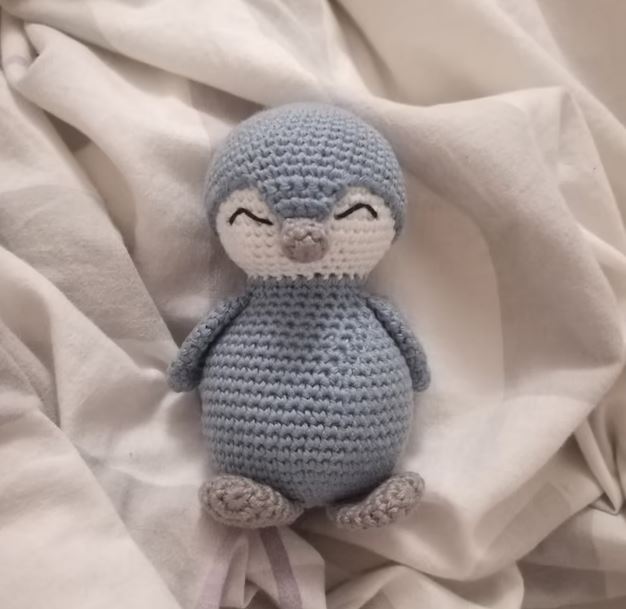
Head
Work with white yarn.
R1: 6 sc in MR
R2: 6 inc (12 sc)
R3: (1 sc, inc) *6 (18)
R4: (2 sc, inc) *6 (24)
R5: (3 sc, inc) *6 (30)
R6: (4 sc, inc) *6 (36)
R7: (5 sc, inc) *6 (42)
R8: (6 sc, inc) *6 (48)
R9 – 16: 48 sc (8 rounds)
R17: (6 sc, dec) *6 (42)
R18: (5 sc, dec) *6 (36)
R19: (4 sc, dec) *6 (30)
R20: (3 sc, dec) *6 (24), slst.
Fasten the thread, leave a long end for sewing.
Head tightly stuffed with filler.
Crochet another head part (pink or gray color):
R1: 6 sc in MR
R2: 6 inc (12 sc)
R3: (1 sc, inc) *6 (18)
R4: (2 sc, inc) *6 (24)
R5: (3 sc, inc) *6 (30)
R6: (4 sc, inc) *6 (36)
R7: (5 sc, inc) *6 (42)
R8: (6 sc, inc) *6 (48)
R9 – 17: 48 sc (9 rounds)
Fasten the thread, leave a long end for sewing. Since the volume and height of your penguin’s head may differ from mine after filling, the 17th row may not be necessary.
Counting forward 18 sc previous
rows from the end of the last row and in
19 st loop, enter the hook, then:
R1: ch1,7 sc, turn the detail(8)
R2: from the second sc 7 sc, turn the detail (7)
R3: from the second sc 6 sc, turn the detail (6)
R4: from the second sc 5 sc, turn the detail (5)
R5: from the second sc 4 sc, turn the detail (4)
R6: from the second sc 3 sc, turn the detail (3)
R7: from the second sc 2 sc, turn the detail (2)
Thread secure, hide the end of the thread.
Try on the pink part of the head on
white and sew.
Beak (1 Part)
R1: 8 sc in MR
R2: 8 sc
R3: 8 sc, slst.
Fasten the thread, leave a long end for sewing.
Beak sew right under,
wedge-shaped part of the penguin’s face.
Body (pink, 1 detail)
R1: 6 sc in MR
R2: 6 inc (12 sc)
R3: (1sc, inc) *6 (18)
R4: (2sc, inc) *6 (24)
R5: (3sc, inc) *6 (30)
R6: (4sc, inc) *6 (36)
R7: (5sc, inc) *6 (42)
R8: (6sc, inc) *6 (48)
R9: (7sc, inc) *6 (54)
R10-16: 54 sc (7 rounds)
R17: (16sc, dec) *3 (51)
R18: (15sc, dec) *3 (48)
R19: (14sc, dec) *3 (45)
R20: (13sc, dec) *3 (42)
R21: (12sc, dec) *3 (39)
R22: (11sc, dec) *3 (36)
R23: (10sc, dec) *3 (33)
R24: (9sc, dec) *3 (30)
R25: (8sc, dec) *3 (27)
R26: (7sc, dec) *3 (24), slst.
Thread secure, hide the end of the thread. Head tightly stuffed with filler. Sew on
the head.
Wings (2 Parts)
R1: 6 sc in MR
R2: (1sc, inc) *3 (9)
R3: 9 sc (9)
R4: (2sc, inc) *3 (12)
R5: (3sc, inc) *3 (15)
R6: (4sc, inc) *3 (18)
R7: 18 sc (18)
R8: (5sc, inc) *3 (21)
R9-11: 21 sc (3 rounds).
Detail fold in half and crochet 10
sc. Fasten the thread, leave a long end for sewing.
Wings sew between the 24 and 25 rows of
the body of a penguin.
Paws(2 Parts)
R1: 7 sc in MR
R2: 7 inc (14 sc)
R3-7: 14 sc (5 rounds)
Detail fold in half and crochet 6 sc.
Fasten the thread, leave a long end for
sewing.
We sew to the body at a distance
1 – 2 sc.
Tail (1 detail)
R1: 6 sc in MR
R2: (1sc, inc) *3 (9)
R3: 9sc (9)
R4: (2sc, inc) *3 (12).
Detail fold in half and crochet 5 sc. Fasten
the thread, leave a long end for sewing.
Sew on the body as shown in the photo
above.
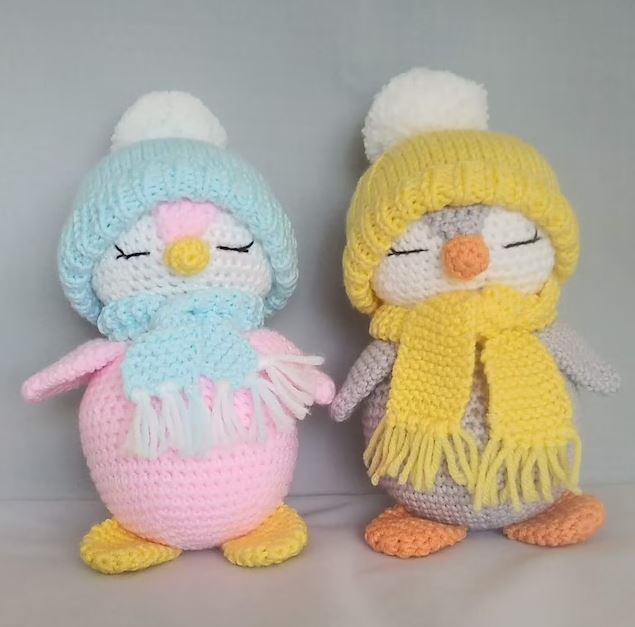
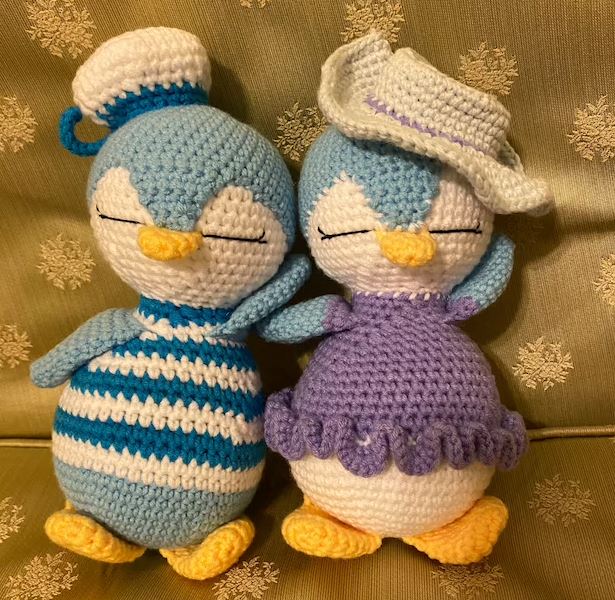
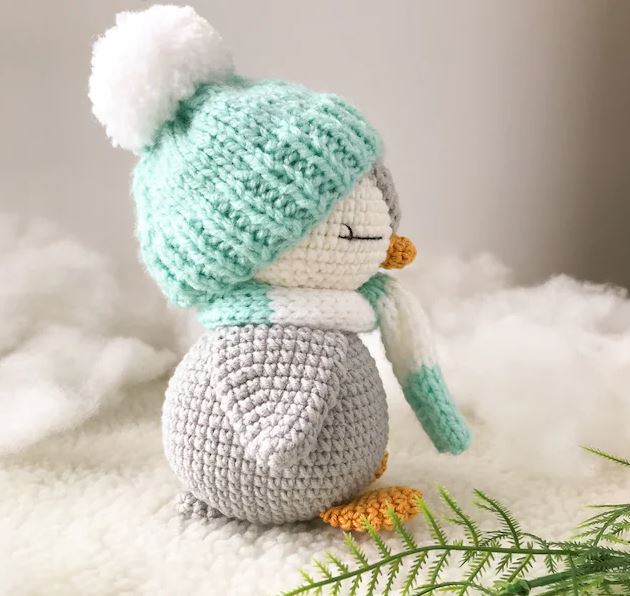
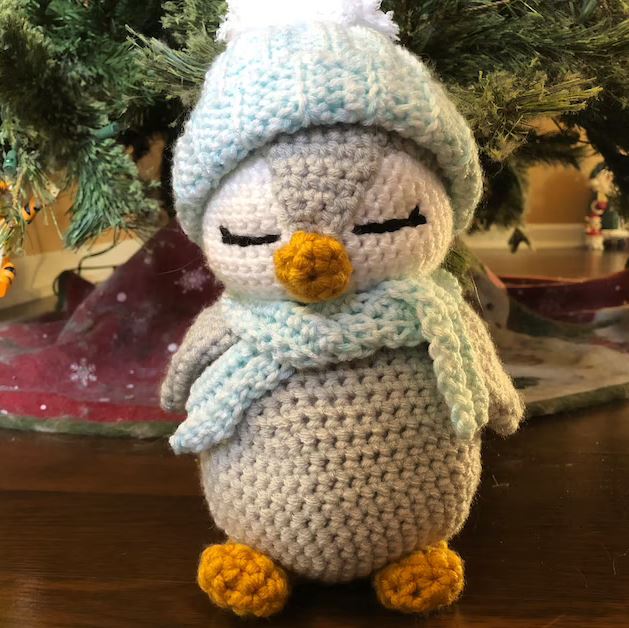
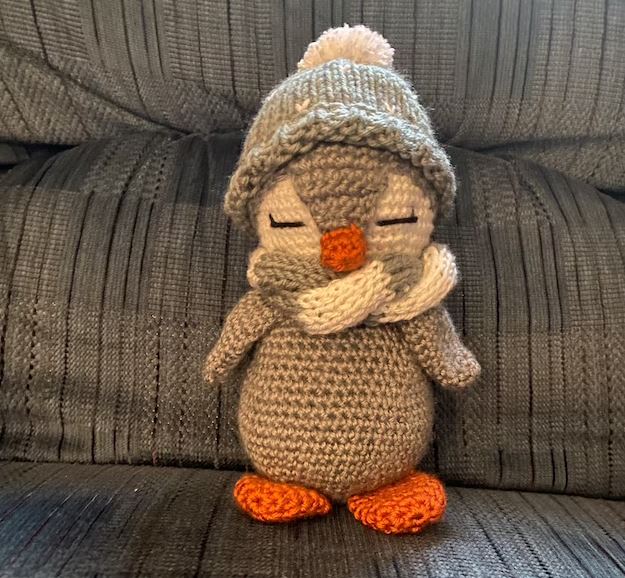
Knitting hat and scarf (for a boy)
I used yarn: Nako Paris 100 g/245 m (white color № 208), Alize baby wool 50g/175m (192 yds), color № 114 (mint color), knitting needles № 2,5.
Hat
Gauge
3 sts/5 rounds = 1cm/1cm
Sizes
Coverage of my penguin head turned out 20 cm.
With needles, cast on 60 sts.
1st row: (RS).K1,K1,P1.Rep from to last st.K1.
2nd row: P1.K1.P1.Rep from to last st.P1.
Rep last 2 rows (K1,P1) ribbing until work
from beg measures 12 rows, ending on a 2nd row.
Proceed in stocking st until work from beg measures 14 rows, ending on a purl row.
Shape crown:
1strow:(RS)Edgest.K1.K2tog.K14.K2tog.K1.K2tog.K14.K2tog.K1.K2tog.K15.K2t
og.P1. = 54sts.
2nd and alt row: Purl.
3rdrow:Edgest.K1.K2tog.K12.K2tog.K1.K2tog.K12.K2tog.K1.K2tog.K13.K2tog.P= 48sts.
5throw:Edgest.K1.K2tog.K10.K2tog.K1.K2tog.K10.K2tog.K1.K2tog.K11.K2tog.P1= 42sts.
7throw:Edgest.K1.K2tog.K8.K2tog.K1.K2tog.K8.K2tog.K1.K2tog.K9.K2tog.P1. =36sts
9throw: Edgest.K1.K2tog.K6.K2tog.K1.K2tog.K6.K2tog.K1.K2tog.K7.K2tog.P1. = 30sts
11throw: Edgest.K1.K2tog.K4.K2tog.K1.K2tog.K4.K2tog.K1.K2tog.K5.K2tog.P1. = 24sts
13throw: Edgest.K1.K2tog.K2.K2tog.K1.K2tog.K2.K2tog.K1.K2tog.K3.K2tog.P1. = 18sts
Break yarn, leaving a long end. Thread end through rem 18 sts. Draw up and fasten
securely. Sew back seam, reversing halfway through ribbing for turnback cuff.
Embroidered with white thread in random order checkmarks as decorative
elements.
Pompom: Wind yarn around 3 fingers approx 80 times. Remove from fingers and
tie tightly in center. Cut through each side of loops. Trim to a smooth round shape.
Sew pompom to top of Hat.
Scarf
With needles, cast on 8 sts.
1st row: (RS) Edge st.K6.P1
2nd row: Purl
Rep last 2 rows ribbing until work from beg measures 102 rows, ending on a 2nd
row. Changed color every 7th row.
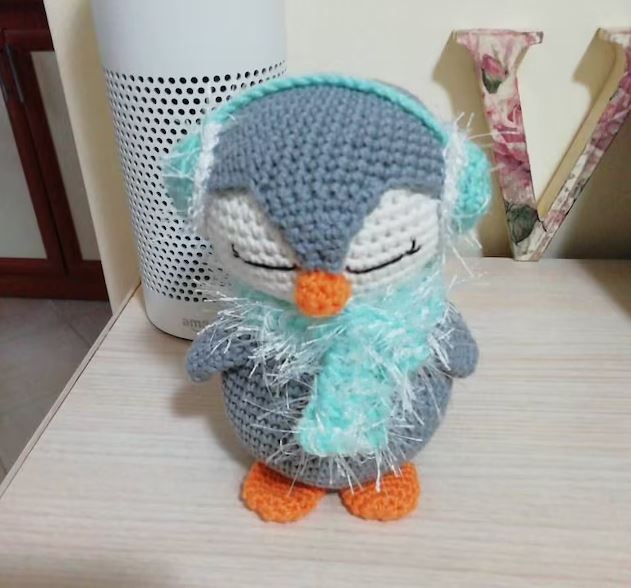
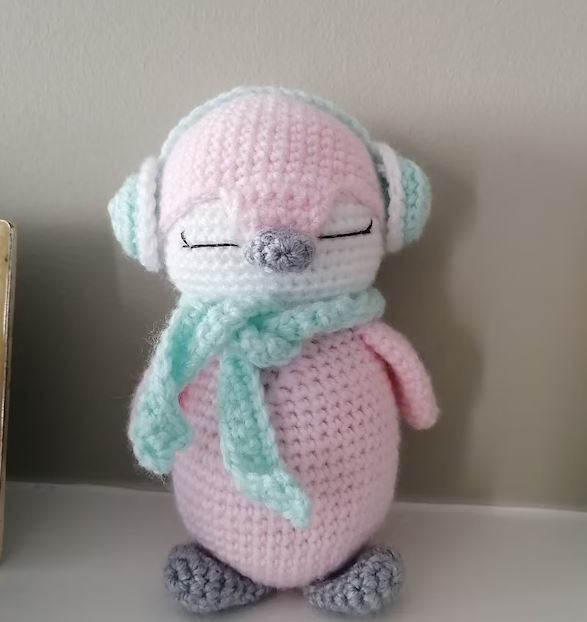
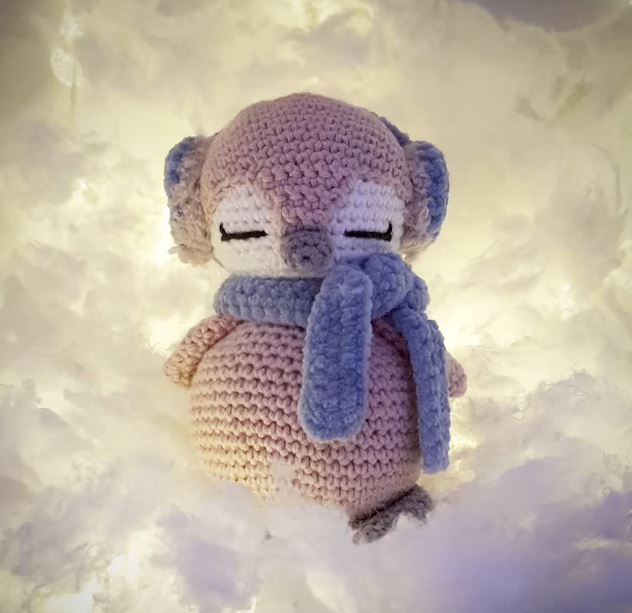
Headsphone and crochet scarf (for girls)
You will need any yarn with a suitable color of mohair 50 g/200 m, Alise Softy 50
g/115 m, color № 55.
Scarf
Crochet 71 ch:
R1: 70 sc, ch1, turn the detail
R2-3: 70 sc, ch1, turn the detail
R4: 70 sc.
Thread secure, hide the end of the thread.
Headphones (2 parts):
R1: 6 sc in MR
R2: 6 inc (12 sc)
R3: (1sc, inc) *6 (18), slst.
R4: ch 1, 18 sc BLO, slst.
R5: (Change yarn to Alise softy) ch 1, 18 sc, slst.
Thread secure, hide the end of the thread.
Clip the main color thread on one of the headphones for the last crocheted row and crochet 20 ch (you can have different ch, focus on the head circumference and the desired position of the headphones on your toy) and connect to the second headphone. Thread cut and fasten. Sew headphones on the head.
In the course of sewing headphones to the head stuffed theirs to the desired result.
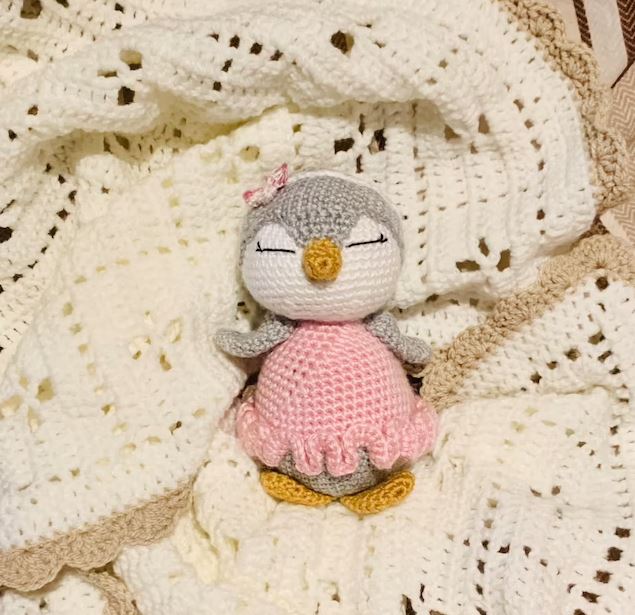
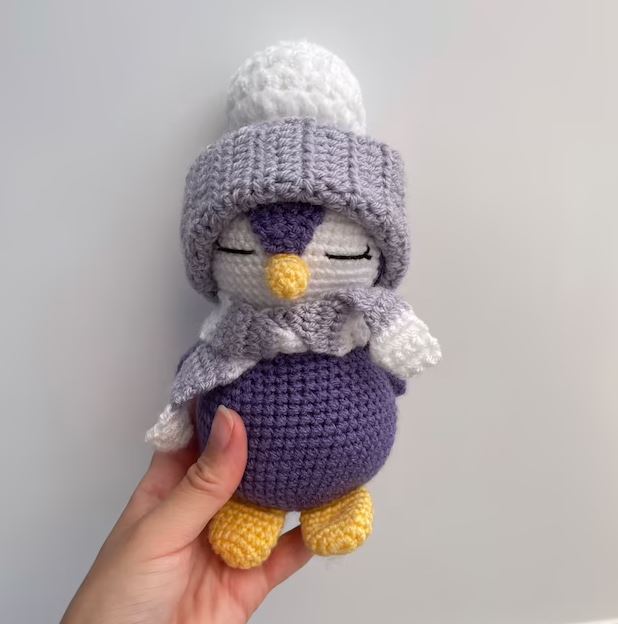
More Amigurumi Penguin İdeas